Wednesday, February 6, 2013

Papertrey Ink 6th Anniversary Celebration: Printable Freebies Challenge

Hello Papertrey Ink Fans!
Here today with a set of cards I made using the free design printable over on Nichole's website for Papertrey Ink.

Today Nichole introduced (or re-introduced) the 2013 Stamp Designers.  Each of these women bring incredible design talents to the Papertrey Ink team.  To say that I admire them is a HUGE understatement.  They, along with Nichole, produce some of the most beautiful stamp designs in this industry that I love so much!  In honor of my great appreciation for them as a team I decided to make a project with each one of the images.  I set some boundaries for myself so that I could work fast:
1.  Go with the very first idea that popped into my mind.
2.  Don't sweat paper choices - go with the first thing that matches
3.  Keep it simple
4.  Make at least one item for my son on Valentine's Day

Here is what I came up with in 3 hours and 39 minutes - with one quick pick-up of my son from school as he had a half day today....


I must say that putting some limits on my creativity was fun! And productive for me!  And I like the way the projects came out - with only a few things I would change here or there if I had permitted myself more time.  It was also faster because there wasn't much stamping for me to do since I was using these gorgeous designer images - HERE!

Here are some individual project pictures:
I enlarged this image made by Dawn McVey so that I could create a circle card with the bigger image as the entire focal point.  A little bling and some layered diecuts and the card was done. If  I was going to take more time I would have hand cut the flower image and popped it up a level.  Dawn - I love how you use flowers on your cards and I have to say that your stunning pine cone stamp set this year made my heart melt! Just ADORE it!!!!  And also love your sentiment sets too!!! Your blog posts about your family always make me smile as I also come from a large Italian family!


I love the hombre effect of this image by Maile Belles!  I decided to make a blush card stock tag with lots of lovely layers so that I can use this for a Valentine's Day gift next week.  I love the arrow and the cool fonts she used! So fun and spot-on trend wise.  Maile thanks for your wonderful modern stamp designs.  Your blog is full of inspiration and I am always inspired by your incredible creativity with just a few items.  Love the white space! 

 
 I adore this "I love you" sign by Lexi Daly!  My son and I say I love you this way often and I thought it would be a perfect little Valentine's gift for him on the morning of Valentine's Day.  I kept it simple as we will be using this in his books that he brings home from school each night for his 30 minutes of reading.  I love the red, turquoise and white color combo and the matching twine on this one.  I also added some copic highlights and coloring to the image itself just for fun! Thanks Lexi for your awesome designs! I love "Comfort Food" as ice cream and gelato are favorites in my family!  So excited to see what this year holds!


Erin made this fun image!  It just made me think of summer time and trips to the Woodland Park Zoo here in Seattle.  So I chose to color it and add a sentiment from Summer Jar Fillers - "Sweet Summertime".  I think it would be a great card to give to my son Tim's teacher at the end of the year which is coming soon!
I love Erin's design style!  And her release projects always make me smile!  She has such a fun "blog-voice" and comes up with some very unique ideas - as all of the designers do!!!


This adorable image was done by Melissa Bickford.  I love Melissa's use of white and just a few colorful supplies and her wonderful $5.00 stamp sets!  Her cards are always crisp, colorful and fun and so I went with white on this card and tried to emulate her style!  I printed the image out on vellum and then backed it with clear cardstock and layered it into a square die cut window.  Love the way it looks in the light!   Love this image Melissa!  Thanks for your wonderful designs!  Your sentiments and images together make for some very sweet cards!


Lizze Jones made this sweet candle image!  I immediately thought of how many candles were blown out on my cake a few weeks ago and thought I would need to use more than one of these images.  Then this idea (which I first saw on Betsy Veldman's blog) popped into my head and I went with it.  I added velum to the center image to add the sentiment.  I love the way it helps bring focus to it.  Lizzie I love your designs - especially Love Potion!!!! So excited to see what new stamps sets you have coming out!


Heather designed this image and oh I love the chevrons!  I decided to add the color yellow with a copic marker to make it a bright happy birthday card for my sister.  Plus it is cloudy and rainy this afternoon in Seattle so I needed some indoor sunshine! LOL!  I think of Heather as the Kraft-Master...and she is also a Craft-Master too!  I love her use of kraft card stock and I remember the first time I ordered a set of Papertrey Ink Cardstock in Kraft was after seeing some projects on her blog!  I also love her scrapbook pages that she shares!  Thanks Heather!


This lovely image is by Tiffany Pastor and just made me smile as soon as I saw it!  Once again I thought it was just asking for some yellow and sunshine!  I think I should have used white for my card base but I still smile when I look at this card!  I hope you saw the additional frilly flower images on Tiffany's blog: HERE.  Just love Frilly flowers and her wonderful blog posts!  And Nativity Silhouettes is one of my favorite Christmas sets! And it contains the beautiful angel glow or sun ray stamp that I use ALL THE TIME! Love it!  Thanks Tiffany!

Wow!  Did you make it through this long post!  I just couldn't pick one image to use this year when I am inspired by all of these women and the entire design team at Papertrey Ink.  I hope to make a card from each of them next!!!  Won't that keep me busy and happily crafting away!  Happy 6th Anniversary Papertrey Ink!
Hugs,
Jill

Edited to add:  Kelly commented that I should upload each card separately so I uploaded this blog post as my first entry - for the card made with Dawn's image.  And I used photo bucket to upload the other 7 images although I think I did something wrong as the thumbnails did not show on the inlinkz tool on Nichole's website.  But it does work if you click through to photo bucket.  :) Jill 

Friday, February 1, 2013

A little bit of sunshine...

Hello Friends,
Here with a quick card tonight.  I made this one for my sister's birthday which is coming up in a couple of weeks.  She is a sunshine person and loves being outdoors surfing at the beach.  I have done lots of surfing cards for her in the past so I decided to go with sunshine as the theme this year. I am entering this card into a challenge at Really Reasonable Ribbon:  Challenge #65: Monochromatic Color and Ribbon Theme.  You can find the info: HERE.  I hope you join all the fun too!

Here is my card:
 I might make a second card too because I had an embossing folder set out to use on the yellow cardstock but forgot to do so before assembling my card.  I really must start embossing first instead of stamping because I always forget!!!!
Here is a close-up of the sentiment from Lili of the Valley Stamps in the UK.

 I hope each of you have a day filled with sunshine in your hearts!  The sun actually made an appearance in Seattle today and I spent a bit of time out in the backyard enjoying it!  My son and I also walked to the grocery store this afternoon to soak up even more of it!  In Seattle if it is sunny you can pretty much find EVERYONE outside of their homes taking advantage of it! LOL!  Especially after all of the overcast and rainy days we have endured the last few months.  Happy Friday Night!

P.S.  The sun always makes me think of my summer garden and the smell of my roses in full bloom....I always cut some to bring inside and enjoy...here are some pictures from last summer...


                                             Crafty Hugs,
                                                : )   Jill

Thursday, January 31, 2013

Craft Room Idea #1


Hello Friends,

Some of you may know that I am in the process of re-organizing my craft room.  Like any good craft room re-do ideas and projects seem to multiply as you get into it.  I thought I would share a few of my craft room storage ideas on the blog over the next few weeks.  Here is my first: 

Today I was at the thrift store hunting for anything white and sturdy that I could place my 12x12 paper holders on when I spied these:

 You might be wondering... Jill - what the heck are these?  And why would you even buy them?   Well....they are Rationell Pot Lid Racks from IKEA that I found at the thrift store. But what I saw in my head (with 5 minutes of my time and a can of  Krylon Blue Ocean Breeze Paint because they were totally out of my very favorite colors at BOTH STORES) was this:


This lovely little 6x6 Paper Pad Holder is now attached to the foundation post that sits a couple feet behind my main craft desk.  I always like to have a few of my favorite paper pads out near my desk (for easy reach and colorful inspiration) but I prefer to not have them ON my desk as it isn't that big and I like space when I am stamping. This is the perfect solution.  It also gives you a peak into my craft room which is a big mess right now!  

I am in the process of REALLY organizing everything and labeling, labeling, labeling!!!!  Crafting is quicker when you know exactly where everything is.  Over the past few years, before my husband passed away, my craft stuff was moved out of the way to make room for a "bedroom" of sorts for the family member's helping out and often staying at our house during his almost 2 year illness. (Thank God for my wonderful Family and Friends who saw us through and continue to support us!)  It has been almost a year since my sweet Stuart passed and the bed is now gone - given to a family in need over Christmas break which made me happy - so I am finally re-organizing the basement and taking my craft stuff out of boxes and getting it set up in the additional space that is now available.  

I also mentioned in reply emails to some of you who I get chatty with (I just love my blog friends by the way!) that I am building a large crafting table.  I am using two Closetmaid 9 cube bookcases and a hollow core, non-drilled door (ie: no doorknob holes etc) of the same width as the bookcases to "build" it for around $100.00 total.

  Once I finish building the table and putting things in their newly organized places I will post some pictures of my completed space.  I may even hunt up a "before" picture of the tiny space I was working in until recently - if I can find one.

My little one is home from school and we have a free day tomorrow - day between semesters - so I am off to spend some time with him doing something FUN!
I hope you enjoyed my first little tip!
Please note: When I checked the IKEA web site the pot rack appears to be discontinued.  But Amazon.com has something similar: HERE

I have a lovely Pinterest Board called "Craft Spaces and Storage Ideas"  if you want additional inspiration.  One of my favorite spaces is from a new blog friend named Winnie.  Check out her space:  HERE
I have another link that I love too of a room completely done from found and fixed-up items but I can't find the link tonight.  Do you have a favorite craft space idea?  I would love to hear it if you want to share it in the comments.
Thanks and Crafty Hugs,
Jill

Wednesday, January 30, 2013

Happy Birthday for someone special....

5:20AM 1-31-2013:  Edited to add:  I have been playing around with my blog template in BLOGGER this morning to change to a larger and easier to see view.   I am getting older and the larger view will be much easier on my eyes! LOL!  So yes my blog probably does look different to those of you who come to visit me often!  Hugs! :) Jill 


Hello Friends,
Tonight I am linking up a card that I made for this week's Moxie Fab Tuesday Trigger!  I always think about playing but have only done so once (or twice maybe?) since I started making cards.  I am hoping to do better this year!  Anyway this week's trigger spoke to me and since it was dedicated to Cath's Mom for her birthday I really wanted to play along to SAY:

Image Credit on Moxie Fab World Blog: HERE

I was inspired by the woodgrain background with the happy colors and that sweet little bird! I just love his flowered wing!  I played around with trying to add other elements to my card, like the butterfly and flowers, but - in the end- decided that simple was best...


I dedicate this card to (of course) Cath Edvalson's Mom whose Birthday is this Friday!
Happy Birthday to YOU! 
May your year be full of BLESSINGS and JOY!


Thanks for taking a look at my card.  I hope you get to play with this week's Tuesday Trigger too!
:) Jill

Card Supplies: 
Cardstock:  melon berry, aqua mist, rustic cream - PTI
Patterned Paper:  Lily Bee - Head Over Heels
Stamps: Little bitty bird, Think Big Favorites #12
Ink: Ocean - Martha Stewart; Brown Sugar: Jenni Bowlin
Dies:  MFT: Flourish and scallop border - small; PTI: bird; TE: Impression plate: woodgrain
Other: gem, copic markers;

Hello Everyone,
It’s Wednesday and time for the Wednesday Stamp Club Sketch Challenge at MFT! Here is the sketch for this week:


I hope you have time to play along.  There is a wonderful prize up for grabs - a $15 voucher ($20 if you used MFT stamps) to the MFT Boutique. You can submit your entry using the keyword MFTWSC109 to the Gallery at Splitcoaststampers. Entries for this week’s challenge will close on Tuesday, February 5th at noon EST.  I hope you join in all the fun!

Without further ado here is my card:

 This picture was taken outdoors in the rain!  I stayed under the back porch overhang so it is not the best angle or view....sorry!
This one was taken indoors in my light tent. Isn't light fascinating when it comes to photography?!?  I could play all day if I had more time...LOL!!!  I am definitely still trying to get the hang of how to take the best photo for my blog!  It is a challenge!


I used one of my very favorite stamp sets for this card - "Clearly Sentimental About Teaching".  I have a big soft spot for all the teachers who work with my son each day.  They have a very important job and I think they are underpaid for it!!!  So I like to try and give them a little something extra on Holidays and special occasions.  This card is going to my son's homeroom teacher for Valentine's Day.  I had made another card for her but it was given to one of my friend's daughter's who is in kindergarten.  She asked to come downstairs to see my studio the other day and her eyes lit up like the 4th of July (she is 5 years old).  I ended up sending her home with a mini scrapbook album all ready for pictures, some embellishments, and a valentine card for her Kindergarten teacher.  She wants to come and spend the day with me and craft which tickles my heart!   


Here's a little close up of the sentiment panel.  Love that I found that sweet heart-shaped button in my blue button jar!  The papers are from one of my favorite paper collections of all time from The Girl's Paperie!  Love them!  Wish I could buy more or get it digitally and print it out whenever I wanted to use it!  I did alter the paper a little bit by filling in those pink lines you see next to the blue with a copic marker RV11 - pink.  I thought it needed a little more substance to compete with the red polka dots on this card.

Thanks for taking a look at my card!  I hope you join in this week's challenge!  It is also teaser time for the February 2013 release!  I am loving what I am seeing as I do each month.  See - I really, really, really DO need that $20.00 voucher so I can grab some new yummy crafting supplies at MFT!  LOL!!! 

:)  Jill


Tuesday, January 29, 2013

"Blessings to You" - Just Us Girls #173


Hello Crafting Friends,
I am here tonight with a card for the Just Us Girls challenge #173.  Here is the gorgeous inspiration photo:


 And here is the card that I came up with:
The idea for this card came from the lovely Chocolate Frosting ribbons on the wedding cake.  I wanted to try making one of my own so I hand-cut this curvy banner shape and then embossed it with the picnic plaid impression plate (PTI).  Then I decided to layer it onto a piece of book paper which I then trimmed out with my trusty scalloped scissors which I haven't used in a very long time but keep on hand for just this type of situation! It needed that little something extra to make it pop!

 I love this flower die from PTI and don't use it near enough!  I colored the Prima gems with a copic marker to get them to match the green shade of the two Sissix decorative corners that I added to either end of the card.  I wanted to bring the green color into a third area on the card. I also edged some of the petals though it is hard to tell from the photo. 
 The leaves (PTI) are also diecut out of book paper from a vintage Sears catalog book I found at the thrift store.  Love, love, love book paper! In the corner of the picture you can also see that I scored the card-base with my scoring board to add more texture.
And the sweet sentiment "blessings to you" is one that I got at a store right up the street from my home here in Seattle - Amuse Art Stamps.  If you are ever in the Seattle area you should check this sweet store out in person verses in web land!  Such a fun place to shop and you can meet the very kind and sweet owner Linda if she is there when you visit.  Linda helped me pick out my very first COPIC markers a few years back (though she may not remember me) when I was overwhelmed with what colors to choose to get started.  I was lucky that when her store front moved a few years ago it stayed on the same street.  It just moved a few blocks south and I can still walk to it - it just takes a little bit longer now.  Great exercise though!

Thanks for visiting my blog and thanks for all the sweet comments you leave for me!  They make my days and sometimes my 3:00AM middle of the night blog haunts when I wake and am missing my husband so bad my heart hurts. I am sure he gazes down from Heaven and is thinking...go back to sleep silly girl!  The many friendships I have made through card-making warm my heart so much!!!  What a blessing you all are!

That is it for me tonight. I hope you have time to join in the challenge.  I can't wait to go and see what everyone has made!

P.S. I would like to dedicate this card to Jennifer Scull and wish her many blessings!

Take care - and Happy Tuesday! 
:) Jill

Monday, January 28, 2013

I am in pillow box heaven for Valentine's Day...MIM #102 Pillow Box Stamping and Assembly

Hello All,

Here with some Valentine's Day pillow boxes for this week's Make it Monday over at Nichole's blog for Papertrey Ink.  One is stamped with the letters "LOVE" from the "With all my heart" stamp set.  The other two are some pattern paper scraps from my paper bin.  I will say this...once you start making these it is hard to stop!  I may make one for each of my siblings this year with a little Valentine treat in it!  What fun!


Thanks for taking a look!
:) Jill

Supplies:  Cardstock: PTI; Patterned Paper PTI smokey shadow pattern pack and another scrap from my bin - not sure who it is by?
Ink: Raspberry Fizz
Dies:  Pillow Box Die - PTI; Flower Dies: PTI; Tiny Doily Dies: Cheery Lynn Designs
Other supplies: Ribbon:  PTI and stash; Twine; scor-tape; glue dots; Vagabond machine


Sunday, January 27, 2013

French Pastry Doily Valentine's

I had a wonderful time in my craft room on Sunday afternoon this week making some little and big Valentine's.

Here are some pictures of the one's made with the French Pastry Doily Die:

I love how cute the card base turned out when using this die!


Design paper is Kaiserkraft - a leftover scrap from my scrap bin.  


Next I made a special "Thank You" and "Valentine" card with one of the felt doilies that I made on Friday night...this card will go to my friends BJ and Mike Dywan -  to thank them for a gift and for their friendship! I give more info about this in the video linked below.
The Canadian Kaleidoscope Doily Die in Cream with red hearts.

  The flower was made with both the French Pastry Tiny Doily Die and the Waltzing Matilda Tiny Doily Die from Cheery Lynn Designs.  The leaves and red doily behind the flower are also Cheery Lynn dies and the large cream flower is Prima I believe.
For those interested - I give more detail on how to make the flower with the tiny doily dies in the You Tube video linked below:


One last card...this one is for a special friend of mine - a soul sister if you will.  I will be mailing it to her in a couple of weeks.... One of my goals this year is to keep practicing with my Copic markers.  I think I have made maybe 6 or 7 cards in the last year  with stamps I have colored?  Most of my coloring jobs have not been fit for a card front as I always goof up!!! LOL!!!  But coloring is very soothing so I will keep at it!

 I tried really hard to work on the hair for this one but I still don't have all the marker colors that I need for blond hair....so I tried to improvise...not too sure of the result but I sure love this MFT Stamps "Jolinne" image with the heart banner!  Isn't she sweet! Thanks for taking a look at my cards!  By far this has been the most I have crafted in the last 6 months and I have the ink on my hands to prove it! LOL!                                   :) Jill

Friday, January 25, 2013

Scrumptious Felt Doilies!!! Yummy!


Hello Friends,
I am here to tempt you tonight with a little bit of felt doily YUMMY-NESS!!!

I just love and adore doilies for my projects.  And some of you know that the lovely and intricate doily dies from Cheery Lynn Designs are some of my favorites especially when I am working on vintage or shabby-chic type projects or cards.

I also love FELT!!!! I love the softness and dimension it adds to projects and its texture!  I have tried die cutting felt doilies in the past but have had various problems.  But today I finally tried with the addition of some copy paper taped to the back side of the felt before die-cutting. (Thanks to MFT for the suggestion!) And it WORKS!  I can now cut these intricate doily dies from felt and they are so scrumptious in person!  My pictures taken tonight in my basement craft room don't do them justice.  Hop over to You Tube and type my name and you can see a video (or 3 since I don't know much about making videos yet) of this technique in action...


 Here are some pictures demonstrating what I created tonight - you may need a cup of coffee to make it through them all...just saying....
I cut 4 different doilies from felt:  DL102: French Pastry Doily - Pink above; DL103: Italian Flourish Doily (pictured below); and DL104: Canadian Kaliedoscope Doily - white, red and teal shown above.
DL103: Italian Flourish Doily - my very favorite!!!!  And it now comes in a mini size too!!! In this picture I have just finished die cutting and I am gently removing the felt from the die...the holes in the back of the die are helpful for getting the removal process started.
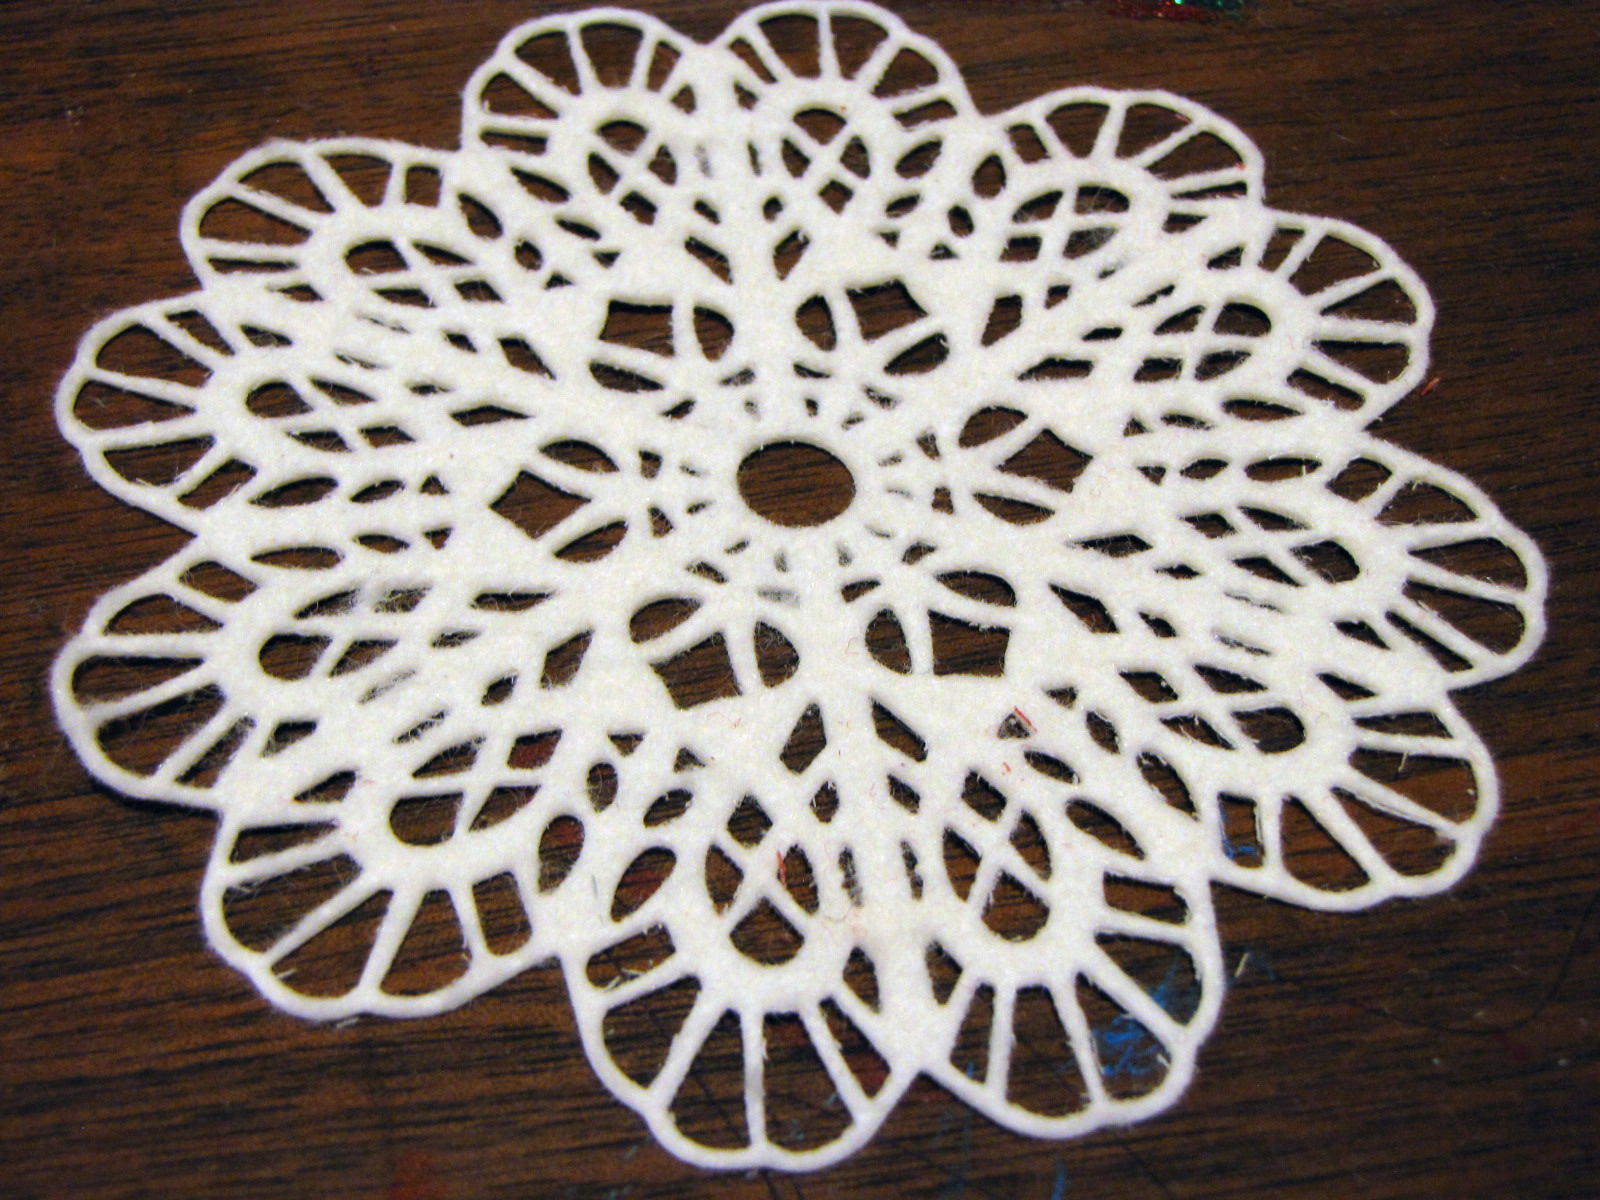
I was so excited when I removed this die with no tearing!  It looks like a beautiful snowflake in this cream colored felt!
The Canadian Kaleidoscope Doily in Red felt!
In cream felt with red felt accents added back in!  Valentines Day cards and Scrapbook layouts here I come!!!
And red felt with a touch of cream felt added in....
And teal felt with cream added!  I love the Folk Art feeling to this!  Spring Tulips and Easter Projects anyone?
One more view of the cream felt version of the Italian Flourish Doily - so beautiful!
The French Pastry Doily in light pink felt!  Ahhh!!!!  

Thanks for looking at all my pictures!  I hope to add some taken in the light of day over the weekend!  But I wanted to get this posted as I was so excited that these came out so well!

Technique Notes:
Felt product suggestion:  I had the greatest success rate with felt from My Favorite Things.  Note: The heavier wool felts in my collection did not work with these intricate doily dies - though I love it  for standard shape die cuts!  I used regular copy paper as my backing attached with Ad-Tech Adhesive from my tape dispenser. 

You can also use the Cheery Lynn Designs angel wings (linked below) to cut a piece of clear card stock to back your multi-colored doilies to hold all the little pieces in place. Or just be very careful when gluing!  A dot of glue on each little piece doesn't take too long!

Again a Xyron machine would be very helpful with this if you have one! 

Shopping Enabler Alert:  Have you seen all of the new Winter CHA releases over on the Cheery Lynn Designs website yet?  The Design Team did a wonderful release post on the Cheery Lynn Blog: here.  I love the paper easels that you can use to prop up your projects in your craft room or for picture taking.  And oh the doilies...big, tiny, and oh so lovely!

That is it for me tonight!  I can't wait to make some projects with some of these felt lovelies... Happy Weekend!  
:) Jill
 

A few Valentines....just for fun...

Hi Everyone,
Just a quick post with some Valentine's Day cards using goodies from Taylored Expressions, Simon Says Stamp, and Sweet and Sassy Stamps.  Working on cards for teachers and friends...

Border Die:  Taylored Expressions; Heart dies:  Sweet and Sassy Stamps and Lil Inker Designs.  Stamps: TE and MFT

Taylored Expressions Stamps and Dies.  Love that sweet dinosaur!  And new baker's twine in my favorite color combo from Timeless Twine! 

Taylored Expressions Stamps, heart banner die - Simon Says Stamp!  Love it!
 3 down....and so many more to go!  And I am still in the middle of purging and re-organizing my craft room!  Built a big new crafting table (which I still need to paint) that is making a WORLD of difference in my crafting pleasure!  Yesterday was my first day putting it to real USE!!  YEAH!!!!   Love that you can build a crafting table with a hollow core door and some bookcases!

                                     :) Jill