Sunday, September 1, 2013

"Sweet Summertime" at the Shabby Tea Room....


Hello Friends,
I am very excited to share with you that Debbie has asked me to be a month long guest designer over at "The Shabby Tea Room" for September 2013!  This week's theme is "Sweet Summertime" and here is the beautiful inspiration photo:

The Shabby Tea Room:  Week #182

Paper Sweeties is the sponsor this week so I thought it was only fitting to make my cards using my sweet Abigail stamp set!  And since I have several very special young ladies celebrating birthdays this month I went with birthday sentiments on my cards.  The first card pulls more of the pinks and aquas from the inspiration photo with just a hint of purple in it.  Here is a photo and a close-up:


And the second card has more of the purple and pinks with just a hint of aqua on her dress which I added to the design paper with a copic marker:


I hope you join in the fun at the Shabby Tea Room!  I am so excited to be the guest designer for the month of September!  Thanks Debbie!
:) Jill

Paper Sweeties stamp sets used in my cards:

Abigail
$10
Abigail is a sweet little girl with shoulder-length hair, dressed in a pretty camisole and bloomers!
SKU: PS-A. Categories: , .
- See more at: http://www.papersweeties.com/shop/all-products/abigail/#sthash.G461123B.dpuf

Abigail
$10
Abigail is a sweet little girl with shoulder-length hair, dressed in a pretty camisole and bloomers!
SKU: PS-A. Categories: , .
- See more at: http://www.papersweeties.com/shop/all-products/abigail/#sthash.G461123B.dpuf


Sunday, August 25, 2013

Papertrey Ink August 2013 Blog Hop

Hello Friends,
Here with a card for the August 2013 PTI blog hop!  Here is the inspiration I chose to work with:


This is the only card I have made this whole weekend and I struggled from beginning to end!  I do not craft well when I am overtired!  LOL!  And for some reason having to follow the sketch and color story was making me struggle even more when you would think it would be the opposite!!!  I think I need to add a dark brown mat behind the sentiment panel or something!  This would be a great card for the Stamp-A-Faire remix I think because to me something is a wee bit off!!!  But at least I made something!  :)

Enjoy hopping around!  I can't even get to the in-linkz list to upload my card or to see who has uploaded because Nichole's site keeps going down on me.  Maybe I can hop around and look tomorrow! 

Good Night!
:) Jill


Stamp-A-Faire 2013 - Opening Color/Sketch Challenge

My sister Natalie with her first ever card and my son Tim on Stamp-A-Faire Day 2013

Hello Friends,
Did you all have fun crafting this weekend - either at home or away as part of Stamp-A-Faire?  I had a grand time though in all honesty I didn't actually make a "whole" project yet.  I just dabbled and played with tea-dying, paper clay and shrink art mainly and then spent the rest of the day outside with my son playing with the neighbor kids and enjoying the last of the summer weather here in Seattle.

Tonight I have been having problems accessing Nichole Heady's blog "Capture the Moment" to try and upload to the Stamp-A-Faire links.  I keep getting an error code and the site then goes down.  My computer and every other site I am using are working fine so it may be that Nichole's blog is experiencing problems or that we are all trying to watch videos and/or access/upload at the same time and the sight is going down from that? 

Anyway I am going to just share a little bit about my Stamp-A-Faire day with you and not worry about adding my items to the in-linkz lists on Nichole's blog or about uploading the color story and sketch photos that we chose to use.  :) 

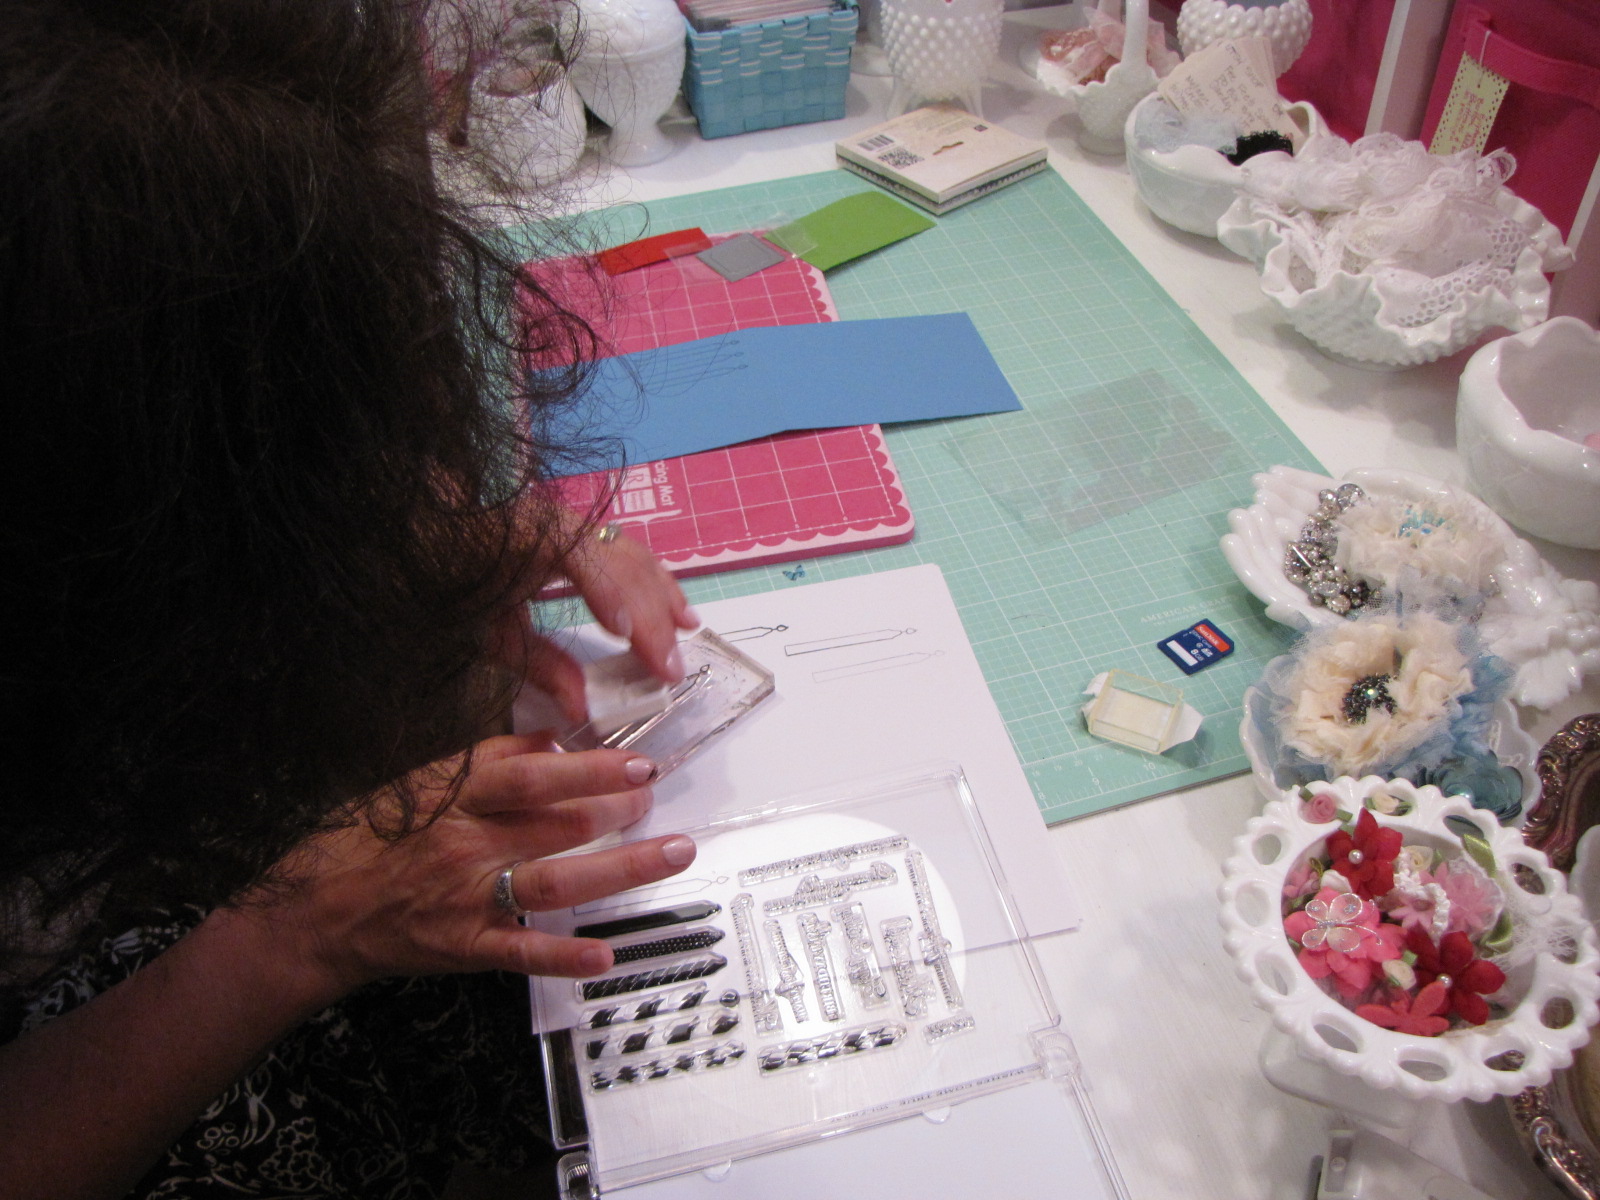
I was blessed to have one of my sisters, Natalie, come over to spend the morning with me in my craft room.  My sister Natalie is a wonderful painter and artist but is not familiar with stamping and card-making.  She needed a birthday card for her husband so I enjoyed showing her how to make a card and do some stamping for the very first time!  We giggled a lot and I laughed at myself because I am not used to telling someone all of the little tips and tricks that I have learned over the years!  My lack of teaching skills resulted in a few mishaps along the way but for a first attempt I thought Natalie did extremely well!  Most importantly we got to have girl time together (while crafting which is a bonus) which is what sisterhood of any kind is all about!  Here is a picture of her inking up and stamping for the first time!

  
Here is a picture of her finished card:
And the inside:

The stamps on the inside are not PTI stamps.  They are wood stamps that sit on a stand on my desk all the time and are some of my favorite "inside the card" sentiments.

Did you tea-dye any fabric?  I thought I would share what my fabric looked like before and after:
I love the tea-dyed color that I got and cannot wait to make something.  I started a card but to be honest I was tired and couldn't seem to create anything.  So I took a break from creating and my sister and I went outside to visit for a while before she needed to leave.  There is always tomorrow....and the next day...and so on.

I want to thank Nichole and all the wonderful team members at Papertrey Ink for such fantastic inspiration!  The tutorials and videos were so much fun to read and watch!  I still have not even seen everything!  It is wonderful to have so much inspiration available for free anytime I want to refer back to it!  My son's favorite part was of course shrinking the plastic with my heat gun!  So fun to watch it change before your eyes!!!  I couldn't take a picture because I was helping him do it! :)

I have seen a few of your posts and it looks like lots of fun and visiting was done by all!
Thanks for stopping by!
Hugs,
Jill

Saturday, August 24, 2013

Stamp-A-Faire Creative Retreat 2013 - Friday Night Meet and Greet


Hello Everyone!
Just wanted to take a moment to say hello from Seattle, Washington. Tim and I are so excited to be taking part in Stamp-A-Faire 2013.

  It was so much fun last time that we couldn't wait to take part again!!!

 Here are some pictures of what I have been cooking up so far in my kitchen tonight while Tim is fast asleep:
 A little bit of tea-stained muslin is "curing" on my stove-top tonight and the smell of tea permeating my kitchen was heavenly as the cooler air begins to make these late summer evenings a little bit chilly! 


And in my crafty basement cave -

On my newly painted craft table (that I built earlier this year) sits all of my delicious Papertrey Ink goodies for creating come morning! 


I love my baby utensil holder that I re-purposed from another area of my craft room!  All ready for some yummy smelling "scratch and sniff" cards using my new "Scent-imentals" stamp set!  Cinnamon anyone?!!!!

 And a slightly larger view of my basement craft room:
 I am so excited to learn some fun new techniques from the wonderful Papertrey Creative Team!
See you tomorrow!
:)  Jill

Friday, August 23, 2013

Happy "belated" Birthday Marybeth!!!!

Today a group of wonderful ladies and friends are sending a TON of Super SWEET (slightly belated :) HAPPY BIRTHDAY wishes to our dear friend Marybeth over at
Marybeth's Time for Paper!
  
Marybeth is just one of the sweetest bloggers on the web!!!!  She always has such wonderful things to say about everyone's projects and she extends the hand and heart of friendship in all that she says and does.  I feel blessed to know her and call her friend!  Happy Birthday (a little bit late) Marybeth!!  You are a true blessing in my life!!!
May God shower your life with blessings this year and always!


I love Marybeth's design style!  She has a fresh and clean approach with wonderful little touches that make her cards special each time!  For example I love her use of sequins and embellishments!  They always add that sweet extra touch that makes me oooh and ahhh when I visit her blog and see her beautiful cards.   : )

This card is for you Marybeth!!!
I used my new Papertrey Ink "Scrolling Script" stamp set and dies for the "Wish Big" sentiment and focal point.  And I also wanted to use my new Lil Inker Circle Dies as I LOVE, LOVE, LOVE them so much!!!!
The little cream banner behind the sentiment panel was made with a Cheery Lynn Designs Die.  And the border at the bottom is a die from Impression Obsession.  
 I love the swirls of these sentiments!  :)
I finished the inside of the card with a Lil Inker stitched rectangle mat in pink and a Happy Birthday sentiment from Studio G (not pictured).  And I just had to add a little bit of "Diamond" stickles to the front of the card to finish it off in style.  And the pearls were the final touch!


 A big thank you to our friends Joyce and Cathy for organizing this lovely "Happy Birthday" blog hop for our dear Marybeth!  I hope you enjoy hopping around to see all of the birthday goodness that awaits!  You should have arrived here from Jeanne's blog and I am sending you off to visit with Kara.


Here are all of the links in case you get lost along the way:
Joyce
Jill   (you are here!)
Kara
Kelly
Kim
Lisa
Nancy
Renee
Sharron
Sue
Tracey
Vickie

Happy Birthday again Marybeth! 
   Hugs, 
  Jill

Thursday, August 22, 2013

Merry Christmas my boy....FFC15 - Children's Theme


Hello Everyone,
I am here tonight with a card for my son this Christmas.  I was excited when I saw the theme for the current Festive Friday Challenge #15 which is to create a holiday project with a Children's theme.  Here is the inspiration photo:
Last year during a sale after Christmas I purchased a sweet stamp of a little boy decorating the Christmas Tree from Lili of the Valley stamps in the UK.  This was the stamp that came to mind when I saw the challenge theme.  I knew I would make a card for my son this year for Christmas using this stamp...and here it is....
I am slowly trying to learn how to shade and blend using Copics but I am a rank amateur compared to the many experts I am enjoying watching over on You Tube.  I think this stamp is adorable and it reminds me so much of my son decorating the tree with my husband and I when he was little.  I loved the way all the ornaments would be put on the lowest branches of the tree by him!  It was so sweet to watch the glow in his eyes as he gazed at all of the neat ornaments he was putting on the tree - many that he and I had spent hours painting and glittering while Papa was at work.  This stamp brings back those very precious memories to me!  What a blessing!

Thanks for taking a look at my card!  I hope you get a chance to join in these lovely holiday card making challenges over at Festive Friday!
:) Jill

Wednesday, August 14, 2013

Butterfly Kisses...


Good Morning All!  And welcome to my new subscribers here at Greenwood Girl Cards!  How nice of you to join me!  :)

I am here with a card I whipped up last night for the Serendipity Stamps Challenge #17 - Butterflies. 

I used their lovely Butterflly die to make my vellum and pink card stock butterfly covered in glitter.  The sentiment is also from Serendipity Stamps and came in one of their lovely grab bags from the sale they have going on right now over at their website.  I remember my little boy loving to give butterfly kisses to Mommy with his long eyelashes!  Such a nice memory - and he still has those long, long eyelashes!  :)


 I seem to be on a "pink" kick this summer but will see if I can deviate for my next card! LOL!  Thanks for taking a look!  I so appreciate you sharing some of your valuable time with me!  Have a great day!
Crafty Hugs,
Jill


Saturday, August 10, 2013

God Bless You!

Hello Friends,
Another quick post....this is a card I made to send to a family member who could use some special blessings.
It uses a Lilli of the Valley Stamp from the UK

The rose and cream digital paper is from Iralamijashop on ETSY and the Gingham is from Prettiful Designs and is part of a pastel gingham pack of digital papers which is on sale for $1.25 today.

Thanks for looking!
:) Jill

Candy Canes 5 cents!


Hello Friends
Here with a card for the Festive Friday Challenge #14.  It is an Element Theme Challenge which requests that we include a candy cane on our project.  Here is the inspiration graphic:
 And here is my card:
Thanks for taking a look!  There are lots of gorgeous holiday cards over at the Festive Friday Blog so I hope you will go and check it out!  It is so fun to be getting my Holiday cards ready throughout the year instead of rushing at the last minute.  I have a huge family and I will have a special card for each person on my list come Christmas time!  Yay!  :)
Crafty Hugs,
Jill

Wednesday, August 7, 2013

Happy Birthday Paper Sweeties! - Sketch Inspiration #10

Edited to Add:   8-9-2013:  So excited to find out that I am this week's Friday Featured Fan over on the Paper Sweeties Blog:  HERE.
Thanks so much Debbie!!!!  :)

Hello Friends,
Here with a special Happy Birthday card for Debbie at Paper Sweeties today!  It has been a wonderful first year of sweet and adorable stamps from her company Paper Sweeties!  I am sending this card off to her to commemorate her first year!  It is a wonderful thing to have a dream and follow it and Debbie is an inspiration to me both in The Shabby Tea Room and at her lovely company Paper Sweeties.  Thanks for all you do Debbie!  And Happy 1st Birthday to Paper Sweeties and continued success and blessings to you both!

I based my card on the elements of the Paper Sweeties Sketch Inspiration Challenge #10.  Here is the sketch:

Thanks for taking a look at my card!  Happy Creating!
Hugs,
Jilll

Supplies:
Stamps:  Abigail Stamp Set - Paper Sweeties
Card Stock:  My Favorite Things
Papers:  Digital from various vendors - floral is from Iralamijashop on ETSY
Other:  Bling Bow - Fee Fee's Splendor: ETSY; Ribbon: stash; Flowers: Michael's.
Twine:  stash.; copic markers, ribbon: vintage from ETSY

Monday, August 5, 2013

Happy Wedding Day....and Happy Anniversary Paper Sweeties!


Hello Everyone,
I am having a lovely afternoon in my craft room today as my son is at day camp all day today!  It is super quiet without him here though and I miss him already!!!!  LOL!   But it is good for him to go and have fun with lots of other kids his age.  Today they are having a Reptile Man bring lots of animals to see and Boeing Astronomy will be there to show the kids the heavens.  They are also learning fire safety as they will be having a special cook-out later this week!   I cannot wait to go pick him up in a few minutes and see how he enjoyed the day.  I stayed long enough this morning to watch them open camp with some singing:

They are in a lovely wooded area near our home and I am glad that they have lots of shade as it is supposed to reach 85 degrees today which is hotter than normal for Seattle. 

Since I had some time to craft I made a card for my husband's cousin Natalie who just got married last weekend.  I am late getting it off to her but I think sometimes it is fun to receive things when you return from your honeymoon too!  At least I hope so! 

I used The Shabby Tea Room's latest challenge  - "week #178 Lazy Days"as my inspiration.  Here is the inspiration photo:
This week Starr is our creative host and she asks that we create a card or project inspired by the COLORS FROM THE PHOTO AND INCLUDE A METAL ELEMENT!

 My metal element is the stickpin at the top left of my card.  I used stamp sets from Paper Sweeties.  I just love the wedding sets that Debbie has in the shop.  And it is Paper Sweeties 1 year Anniversary too!  Happy Anniversary Debbie!  I look forward to many more years of creating with your beautiful products!

Thanks for taking a look at my card!  I am off to pick up my sweet boy!
Hugs,
Jill

Saturday, August 3, 2013

Happy Birthday Popsicle Lady!

Hello Friends,
Here with a quick card share.  It is my beautiful and sweet Mother's birthday today!  She is truly the loveliest woman I have ever known and I am so honored to call her my Mom!  Happy Birthday Mom!

My Mom is known for handing out popsicles in the summertime especially after a day spent swimming and playing in the sun.  Here is the card that I made for her using the Cheery Lynn Designs Challenge #91 - Hot Time in the Summer for my inspiration.  I am also linking to a challenge on the CC Designs Blog.  Challenge #2.

I used the CC Designs stamp:  Birgitta with Popsicle and created the sentiment on my computer.  The sweet scalloped layer that Birgitta is stamped on as well as the paper mat behind it in bright pink are made using the Cheery Lynn Designs Rectangle-Scalloped Card Stackers.  I love the small scallops on these dies and use them often when I am coloring larger sized images.

The little pink "blingy" bow in her hair is from my new favorite ETSY shop - Fee Fee's Splendor.  So fun to add these to a card for gift giving!

 My son and I are on our way over to spend the afternoon with my sweet Mom right now.   Thanks for taking a look at my card!  Happy Weekend!
:) Jill

Edited to add:   It looks like I missed the deadline on the card challenge by 4 minutes...bummer...so you won't see my card linked over at the Cheery Lynn Blog this week!  Oops!  They changed the deadline to Saturday afternoons...boo hoo!  :)

Sunday, July 28, 2013

Joy and pink jingle bells


Hello my friends,
Today I was painting some items a lovely shade of "Peony Pink" in my studio.  One of those items was a bag of jingle bells.  Some pink paint and a wee bit of glitter and they were all ready for a Christmas Card.  Which brings me to the "Pink, White, and Silver" Color challenge over at the Festive Friday Challenge Blog.  So here is my entry into FFC13:
 I die-cut the WPlus9 snowflake out of my doily and then cut it again in pink, stamped it with a gingham background and inlaid it into the silver shimmer doily.  It is hard to tell in the picture but I really like the inlaid look in real life!  The heart tag is stamped and embossed in silver with a WPlus9 sentiment and tied with some cheese-cloth and pink jute twine with a lovely sparkly jingle bell added.  I struggled with the bottom section of the card and am not sure about the felt heart strip even now...but will let the card ruminate over-night and see if a solution presents itself in the morning.  I think my mojo is gone as I am super tired!!!!!  Too much has happened this week and sometimes being a single parent without my beloved Stuart just wears me totally out.  That is why I was crafting tonight - for some "ME" time! 

Thanks for taking a look and I apologize for my lack of comments in blog land of late....it has been a long couple of weeks!
Hugs,
Jill

P.S.  For those of you that were asking Tim is better finally! And Mommy is very relieved!  There are sure some nasty bugs going around...what happened to the 24 hour and 48 hour flu bugs of yester year?

SUPPLIES
Stamps: WPlus9
Cardstock: Papertrey Ink and Silver Shimmer from Thrift store find/stash
Other:  Felt, Cheery Lynn Doily Die; Papertrey Ink hear border die and heart tag die; WPlus9 snowflake die; cheesecloth, jute twine, jingle bell, stickles,

Monday, July 22, 2013

I believe in Angels....


Hello Friends,
It is 7pm on Monday evening and I am finally over my migraine! Yeah! I have a card to share that I made earlier this week and a tag too...


I used a new Cheery Lynn Designs tree die and border die that I purchased from their summer release that just came out.  I love the little star and swish cut outs that are on this tree die.  So pretty!  I added some glitter glue with gold highlights in it so I can enter it into the latest Cheery Lynn Designs Challenge #90 - Silver and/or Gold.  I love the way the gold flecks sparkle in the above photo!  They are even prettier in person!

The card also uses some trendy twine in the color "Posy" (soft pink and cream) which I won on a recent Facebook giveaway!  So sweet!   


Here is another picture which shows the gold glitter effect on the tree better.  And also shows the tag again with the tiny angel wings that I created from the "leftover" cutouts in the Sofia's Heart Border Die.  Now I can make baby angel wings any time I want them.  The Sofia's Heart Doily Die makes slightly bigger angel wings  so you can depict a mother/child or family of angels if you want.  Love this!

Thanks for taking a  look at my card and tag!
:) Jill


Monday, July 15, 2013

I believe in Angels.....Mixed Media Wall Art


Hello Friends,
Well I finally did it....I faced my "fears" and have been working on a Mixed Media Wall Art piece for my bedroom over the past few days.  I recently purchased a new turquoise quilt (with green stitching) for my bedroom and when I saw the colors for this weeks Mixed Media Color Challenge #3 I knew I would make a "FAMILY" piece to hang in my room.  Here is the inspiration photo:


For me this became a very personal piece representing our family. Our beloved "Papa Stuart" is represented with a pair of glittery wings way up in the sky and the saying..."I believe in Angels!".  Today marks 1 year and 5 months since he passed away from brain cancer.   When someone who is such a huge part of your life is no longer present it changes absolutely everything!!  I hope that the personal nature of my post doesn't bother anyone.  For me making this type of mixed media canvas is very personal and therapeutic.  These past 3 years have truly been the hardest of our lives as we journeyed through cancer with him and lost him in February of 2012.  I thank each and every one of you that has offered support to me and my son when I have shared some of the things he is going through and that we have had to face together. Your warmth, kindness and empathy are truly a blessing to me!

Here are some process photos of my canvas - you can skip to the end if you are not interested... : )
 Getting started was the hardest part....all that white space staring up at me. (In hindsight I wish I had gessoed a bunch of background papers to the canvas to get it started and then painted over them before adding my house etc.

 After creating my house from patterned paper and the fence from a die I decided to work on the sky.
I started with some cheese cloth at the top of my canvas and over-layed it with die cut clouds.


 Here you can see that I have added a tree made from tissue paper and some green cardstock leaves that I had trimmed by hand from some stamped cardstock.    I have also added gesso and some brown, aqua, and green paints with my finger and paintbrushes to several areas to begin to create dimension.  A scalloped border helps to define the roof of the house more. 
 This photo shows how I have added some roses with dimensional paste as well as some stamping using the chicken wire distressing stamp created by Mona for MFT.  I have also used some Glitz roller stamps and started adding some rub-ons too.


I couldn't find an angel charm or my stash of tiny silk wings in my stash last night so I hand-cut a tiny pair of angel wings to represent my sweet husband Stu as I know that he is watching over us in spirit.  I will probably change these out when I find them.

Here is Mama Bird watching over her eggs...next time I will distress the cheesecloth and color it before gessoing it!  Oops!  I need some PITT artist pens or something like them....
 I printed my sentiment on a piece of digital gingham paper because I couldn't find any stamps the right size for my canvas.  I smeared the word "where" when adding some gesso and aqua glimmer paint over the top today to seal the canvas one last time.  But really it is just distressed - right! :)
 Here is Papa Bird standing on the roof line of the house made out of buttons with some diamond Stickles added.  I may add some more shading to him as I think he still needs more dimension!
A close up of my "paste" roses.  I unfortunately don't have the right kind of "paint" markers yet for mixed media and couldn't draw in my flower between the roses because the aqua glitter paint by Martha Stewart still wasn't dry yet.  I opted to stop and take my pictures as I wanted to get this posted today.  I will finish the flower later tonight when I fix a few other shading/doodling issues.  My son's fever spiked again today to 103 degrees so we are headed to the Doctor this afternoon after a talk with the nurse.  He has been sick for 8 days now.....and Mommy is a wee bit on the worried side!


Thanks for taking a look at my first ever Mixed Media Canvas Wall Hanging.  I created a wired hanger from some trim I got at Michaels and hot flued it to the sides of my canvas so I can hang it.  I then added a beloved gingham bow to finish it off.

I learned SO SO much during this process.  I know what supplies I need to buy now and have a list of what NOT to do next time!!!!  LOL!  I made a lot of rookie "mistakes"....though there are truly no mistakes when playing at mixed media art from what I have observed on the You Tube videos I have watched!  It always comes together in the end - and most importantly it has meaning in my heart!

 I would love to hear what you think of my very first attempt at a canvas/wall art item!  I never think of myself as doing anything truly artistic with paint as I have family members who are very talented in this area.  I am more of a stick-figure girl myself with a lot of "crafty" in my heart.
 
Until next time...thanks so much for looking!
:) Jill

P.S.  The woman and boy pictured in the house's windows are my son and I.  They were hand cut from a roll of Prima Washi tape if you were wondering.....