Thursday, April 30, 2015

May Inspiration Challenge #31 - 'Celebrate Mom'

Hello and welcome to the May Inspiration Challenge with Paper Sweeties!


This month's inspiration is all about celebrating our beloved Mom's!!!  Mother's Day is such a special day! It is so important and wonderful to celebrate and remember our beloved Mom's whether they are still with us or perhaps smiling down on us from heaven above.  And it is also a day to remember Aunt's, Grandmother's and other wonderful female's that perhaps have played a motherly role in our lives!  I know that I feel very blessed by the many women that are part of my life each day and some that are angels in my life that I miss so very much! I hope that you will join in this month's challenge along with me and the rest of the Paper Sweeties team.

I love this sweet inspiration photo and the kraft, pink and mint colors.  Here is what I came up with:

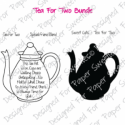
When I looked at the photo I immediately thought of a party!  And what better party to have with our sweet Mom's than a Tea Party!  So I set to work with the lovely colors and the "Tea for Two" stamps and sweet cuts dies.  I made three different items:  - a card, a teapot enclosure card or tag, and a teapot box to hold some teabags.  I embossed the teapot stamp onto each of the die cuts with some "Blush" Zing embossing powder.


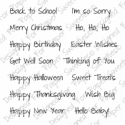
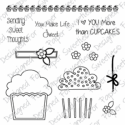
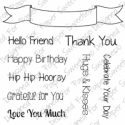
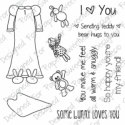
 Here is a picture of the card.  The sentiment is from two different stamp sets.  The "I (heart) You" is from the "I love you" stamp set.  And the word "Mother" is from the "You are the most Wonderful" stamp set. I stamped them in some slate gray ink and then colored the heart with a pink marker.  A bit of lace, half of a kraft paper doily and a paper flower finishes this card.

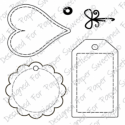
My Mother loves to receive crocheted washcloths for her kitchen.  I made several for her as part of her Mother's Day gift and topped them with a sweet teapot shaped tag that opens so I can write a little note inside:

Here's a picture of it opened part way....on top of the crocheted washcloth....


 Last but not least is a sweet teapot shaped box filled with some lovely organic "green tea" from Trader Joe's.


I love the shabby feel of the Tilda paper I used combined with the "Blush" embossing powder.  It has a rustic antique feeling that I absolutely adore!  I used my Versamark embossing pen to add some extra embossing powder on the teabag box.  I am going to experiment with this some more.  I like the rustic and shabby feeling you can create by making thicker hand-drawn lines. It is especially fun to do this on shabby chic style papers.

Here is one final shot of all three of my projects:...

  Unfortunately I was hoping to have a sunny day to take pictures but it is pouring rain today and gray and cloudy!  So I set up my OTT-Lites and took these photos indoors.  I apologize that the colors are not as bright and pretty as they should be even after some serious photo editing!  I am hoping for some sun over the next two days so I can re-take them before this post goes live!  But one never knows with our Seattle weather! 

Whoo!  That was a lot of pictures! If you are still with me I am ready to send you off to my Paper Sweeties Design Team Mates:
Debbie Marcinkiewicz – Paper Sweeties
May Guest Designer:  Dawn

I want to give a special welcome to our guest designer for the May Challenge - Dawn who blogs at "Designs by Dragonfly"  We are so happy to have her joining us today! Please give her a warm welcome!

Thanks,
:) Jill


Wednesday, April 15, 2015

Paper Sweeties April Release Rewind

Hello Friends!  Welcome to the Paper Sweeties Release Rewind!

Did you splurge on some of the new crafty goodies in the Paper Sweeties shop yesterday? If you are just joining us you can see links to all of the new products as well as some existing one's at the bottom of my post.

This has been one of my very favorite releases once again! There are just so many fun things you can do with these wonderful Tree themed sets!  Today the Design Team shares projects using the new sets combined with some of the existing Paper Sweeties products.

  Here is what I came up with....

First a tree using 3 of the lovely heart tags from the "Stitched Tags #1" sweet cuts dies cut from book paper!  I just love the look of book paper on cards! 

This is actually the very first card I created when I received my design team package but I almost didn't post it.  I usually have several cards that don't make the cut but I decided to share this one after all as I just love that book paper tree with all of its glitter! The love birds are from the new "Tree of Life Add-on: Spring" stamp/die set. The sentiment is from the "I Love You" stamp set.  At the top of the card I also tucked in a little gingham tag top embellished with a hemp bow.  And you can see that I embossed the tree itself to make it look like it has texture on the outside. 

Someone was asking me how I get my ideas for creating all of my cards each month.  The very first thing I do when I receive my new stamps and dies in the mail each month is gather tons of ideas.  Sometimes I have immediate ideas spring to mind as soon as I see the new items and I make some quick sketches or notes in my notebook.  But after that I usually spend a wee bit (or even a LOT) of time on Pinterest looking for inspiration. This month I even created an inspiration board on Pinterest called "Paper Trees".  I thought you might enjoy taking a look especially if you just purchased these new products from Paper Sweeties.  I collected a ton of cards that inspired my creations for this relelase! There are still several things I would like to try when time permits.

Here is one last card...
After finishing the card series I showed on yesterday's post I wanted to try making a spring tree with dimensional flowers instead of stamped one's. The flowers were stamped and die cut using one of the blooms in the "Tree of Life Add-on: Spring" set.  I used the end of a sharpie pen and a cushioned mat to cup the flowers so that they would stand up a wee bit. And then I dotted the flower centers with some diamond Stickles to give the card some sparkle.  The "Thinking of You" sentiment is from the "Occasions" stamp set.  I think it would be fun to make a whole series of these cards in different colors to have on hand.

Well that is it from me today but there is a ton of inspiration to see from the entire team....


Thanks for joining us for all of the April Release Festivities!  And for all of your lovely comments on my projects throughout the release!  
Crafty Hugs!
Jill
  
Supplies:


Tuesday, April 14, 2015

Paper Sweeties April Release Party


Today is the day that you can buy all of the new stamps and sweet cuts dies in the store!  Here again is a list and links to the new products:


We also have lots of inspiration for you to see today! Today I have a card set to share with you that depicts the tree in all 4 seasons of the year.
Here we go:
First the tree in Winter....

I stamped the tree from the "Tree of Life" stamp set and then added the sweet bird and birdhouse from the "Tree of Life Add On: Spring" stamps and dies. I colored them with Copic markers.  The sentiment is from "Sending Holiday Cheer" which I didn't realize was a retired set until long after I had made the card! Oops!  But there are lots of other wonderful Christmas or Winter themed sentiments that can be used for a card like this!  So no worries! I added some coarse white glitter to create snow along the branches and tree house. So festive!


Next comes the tree in
Spring....

I decided to make a lovely flowering tree as that is what all of the trees are doing in Seattle right now! I added the sweet bird and birdhouse from the new "Tree of Life Add on: Spring" stamps and sweet cuts.  And to create the flowers on the tree I used a flower image from the "Sending Sweet Thoughts" stamp set.  The sentiment is from the "Jelly Bean Time" stamp set.  I colored everything with Copic markers to blend with the Melon colored card stock which I embossed with a floral pattern to mimic the flowers in the tree. The flower centers were dotted with glitter and I also edged the card stock panel with some stickles.  It is so pretty when the light hits it!

Next comes the tree in
Summer...

For this tree I decided to stamp the leaves with one of the tiny heart stamps in the "Tree of Life Add on: Spring" stamp set.  I also used the bird and birdhouse from this same stamp set.  The matching dies made it easy to die cut that sweet bird.  I colored with Copic markers again and then selected my sentiment from the "Home Sweet Home" stamp set. 

And last comes the tree in
Autumn...

Here I used a fall leaf stamp from the "Stand Add On Fall Harvest" stamp set to create the leaves for my tree. Then I stamped and die cut the sweet little owl from the new "Tree of Life Add on: Spring" set and perched him in the tree.  The "Thankful" sentiment is from the "Beautiful" stamp set and I inked it in both orange and brown to give it an "ombre" look.  And that pop of turquoise was a happy accident. I was looking for something to make the card come alive.  I had this piece sitting on my desk from a previous card and thought it was the perfect thing!  What do you think? 


It was so fun creating a card for each season of the year! If you have made it this far....thanks for sticking with me as this was a very long post!

There is a lot more to see today if you are hopping along with the Paper Sweeties Design Team...
Here is today's hop list:

 Tomorrow we will return with our Paper Sweeties Release Rewind posts.  I hope you will join us again.  We always showcase how you can mix the new stamps and dies with some of the existing Paper Sweeties products!
:) Jill


Monday, April 13, 2015

Paper Sweeties April Release Countdown

The Paper Sweeties Team and I are back today with more new release inspiration as part of the
Paper Sweeties April Release Countdown! Just one more day until the new products are available for purchase on April 15th!

Here are the products being released tomorrow:

Today I have a couple of masculine projects to share with you using these new sets along with some existing Paper Sweeties products....so let's get started.

My first card is to welcome a baby boy.  I kept this one fairly clean and simple.  I used the tree die and the sweet bird nest stamp and die to create my focal point. I am so in love with this sweet little nest with it's baby egg! It is so adorable!  I felt that it would look wonderful as the focal point for this baby boy card. What do you think?  I loved the way it looked and decided not to add leaves to the tree this time....it keeps all the focus on that sweet baby egg!
 Along with the new stamp sets and dies I also used the "Bouncing Baby" stamp set for the sentiment.  I added some Copic coloring to the sentiment to tie in the blue circle background.  And I thought the whole card was set off nicely with some lovely gray gingham paper for the background.

Next I wanted to showcase the tree with its leaves and created a masculine "Thank You" note:
I used lots of texture on this card with some corrugated card stock and an embossed scalloped panel.  I stamped the tree onto an oval die cut and then stamped the leaves in olive and added the twine bow.  I love how easily these trees come together! The sentiment is from the "Hello Friend" stamp set.

There is lots of inspiration to see again today! Here is the link list:
Thanks for taking a look at my cards today.  I hope you will join us here tomorrow for Release Day! 
And don't forget about our April Inspiration Challenge! We would love to see what you are creating!
Here is the inspiration photo:

These are such fun colors to create with for Spring!  You can link up your creations on the Paper Sweeties Blog.
Hugs,
Jill


Sunday, April 12, 2015

Paper Sweeties April Release Sneak Peeks

Hello and welcome to Sneak Peeks for the April Release at Paper Sweeties! We are counting down to the release on the 15th and are so excited to share all of the projects we have been working on.

The products that are being released this month (on the 15th) are:

Today I have a card to say hello to a brand new baby that uses all 4 of these sets plus the "Occasions" sentiment set and "Stitched Tags #1" sweet cuts dies.  It also features some gorgeous glittered buttons that I created with some Elmer's spray adhesive and extra fine white glitter!  Such a fun way to make the buttons sparkle and shine!

If you look closely (behind the buttons) you can see that I used 3 of the heart-shaped die cuts from the "Stitched Tags #1" die set to create my tree-top.  I then arranged and glued the glittered buttons on top of the hearts and then added the bird and nest with that sweet "baby" egg in it.  I used some doilies to create the ground and added a sweet hemp bow to the tree to finish it off. I wish you could see the sparkle in person - it so PRETTY! You know me....I'M A GLITTER GIRL!  Lol!

There are lots of wonderful projects to see today! And I want to officially welcome Emily Frasier who is the newest member of the Paper Sweeties design team.  She makes incredible cards and projects and we are so excited to have her on the Paper Sweeties team!

  Here is the entire link list for today's hop:
I hope to see you back here tomorrow for more release projects!
Thanks for stopping by today!
:) Jill