Monday, October 31, 2016

Paper Sweeties Inspiration Challenge - November 2016


Hello Friends!  Happy November!  Wow this year is just zipping by so fast!!!! I cannot believe that the end of 2016 is next month!

I am here today with a card for the new Paper Sweeties Inspiration Challenge:

 I love these sweet Autumn colors and since it is November and Thanksgiving is coming I decided to make a card to give to my parents on Thanksgiving Day....

I started with the "Planner Series: Fall Sentiments" Stamp Set to create a fun background.  I then colored the background with copic markers.  I love all of these cute images in the planner series stamp sets.  They are so perfect for creating themed backgrounds!


 For my focal point I used the wonderful "Thankful" stamp set.  I stamped the "thankful" definition onto one of the "stitched tags #1" sweet cuts.  And I also stamped, die cut and colored one of the sweet pumpkins!


 I also used the "Sweet Borders" sweet cuts to create a brown scalloped border layer to top a piece of light orange gingham patterned paper.

 I tucked the tag and pumpkin into the scalloped layer and added pop dots just at the top of them to hold them up away from the back of the card.  Two pieces of lace tied through the tag add a bit of softness and texture to the card.  And some Stickles "Diamond" glitter glue dots add a touch of sparkle to the card and create a sugar crust on the top of the pies.  Yummy!  This card makes me hungry for Thanksgiving dinner! (NOTE:  One of the pop dots is peeking out from behind the tag in my detail shots and I had to fix it and touch up some of my Copic coloring before I retook my main photo.  Snapping a picture of your finished card is often the best way to see if there are any flaws!  Take the picture and then you can fix things before doing your real photo shoot for posting!  Please just ignore it this time as I did not have time to re-take the detail shots. LOL!  Halloween week has been CRAZY busy! ) 

Okay now I get to send you on your way! I am always so excited to see what everyone on the Paper Sweeties Design Team has created!!!! I always get so many great ideas from all of their inspiring posts!

Beth Luetschwager  
Debbie Marcinkiewicz – Paper Sweeties
Nancy Salkeld
November Guest Designer:  Lori Turner

And a special welcome to Lori Turner who is our Guest Designer this month!  I hope you will be sure to visit her blog and check out her project!  Thanks for all of the wonderful comments you leave for me!  I so enjoy reading each and every one of them!

Have a great day!  Be joyful!
Jill


Sunday, October 30, 2016

Merry Monday Christmas Challenge #219

Happy Sunday!  I was feeling in the mood to create this afternoon and went to the Merry Monday Challenge Blog to find some inspiration:


I just love this inspiration photo!  And I love cards with birds!  I have been very inspired to bird watch by my sweet mother-in-law Prilla!  She lives on the Columbia river in Eastern Washington and gets to see so many wonderful birds each and every day!  After seeing this lovely inspiration photo an idea popped into my head and I made this:

 I used a mitten die from the "stitched tags #2" Sweet Cuts set from Paper Sweeties.  I stamped and Copic colored the bird on each mitten die cut. This sweet bird stamp is from the "Home Tweet Home" stamp set also from Paper Sweeties. The white faux fur trim was found at Michael's during a sale they had on ribbon a while back.  I thought it would be perfect for edging mitten cuffs and I love how it turned out.  Such a warm and cozy card!!

The sentiment is a favorite of mine for Mitten cards or tags....it is from the Paper Sweeties "Warm Winter Wishes" stamp set.  I added some red Copic marker to the e's to liven it up a bit.

Thanks for taking a look at my card.  It has been a while since I participated in the wonderful Merry Monday challenges but I hope to do more as I continue making cards for Christmas.
Jill


Tuesday, October 18, 2016

Make it Monday #264: Die Cut Stencil Shapes


Hello Friends,
It has once again been a long while since I have posted a card for a Make it Monday!  I often make the cards but just do not get them photographed and posted....life has a way of getting in the way of crafting sometimes as it should! LOL!  Anyway today I was home with a migraine resting and after my medicine finally kicked in I watched Melissa's video and this card idea jumped in my head based on the snowflake version she shared.  Thanks for the inspiration Melissa.  I was thrilled that I got to use the "all is calm, all is bright" sentiment from my new "Christmas Faith" set designed by Heather Nichols!  I love this set so much Heather!!!! I cannot wait to play with this stamp set some more and maybe use the doves for the stencils next!  Such a fun technique!  I took these pictures a few minutes ago at 9pm so even with my OTT lights the greens do not look right!  Sorry....it does look better in person! I thought if I waited to photograph it I might not get this card posted at all. :)

Supplies:
Cardstock:  New Leaf, White
Patterned Paper:  Kelly Green Gingham - digital print
Inks:  Vintage Jadeite; Smoky Shadow

Stamps: Winter Hills and Christmas Faith
Dies: Fancy Flakes; Monthly Moments Journal Card and Journal Card 2 dies;
          Gina Marie Designs - Scalloped Stitched Rectangle Dies
Other:  pop dots; tombow glue, pink lace - vintatge; stickles diamond glitter glue, pink copic marker; sponge for inking

Thanks for taking a peek!
Jill

Saturday, October 15, 2016

Paper Sweeties October 2016 New Release Rewind

 
Did you make it over to the Paper Sweeties website yesterday to check out the FANTASTIC October Release?  Wonderful new goodies for all your crafting needs for sure!!!! Not to mention that we have awesome Holiday Sequins Mixes in the store as well as new patterned paper!  Yay!  So many exciting new things happening at the shop!!!


~~~~~~~~~~~~~~~~~~~~~~

Today is our October Release Rewind where all of the designers create projects that incorporate the new products that were just released with some of the existing products to show how they all can be used together!  Here is what I have to share with you today:


I decided to shift away from my traditional red and green Christmas color palette and do something in pastels:

This sweet card uses the "Christmas Pudding" stamp and sweet cut from the "Homemade with Love" sets.  I stamped, die cut, and colored the sweet puddings with Copic markers before adding a thin line of Stickles glitter glue to make the frosting sparkle! I also added glossy accents to the holly berries!  I love how shiny they are!

I then placed these sweet puddings in the new Basket Sweet Cut which I cut from a pink polka dot patterned paper.

 I added a gingham "napkin" in mint green to the front of the basket along with a sentiment which is also from the "Homemade with Love" stamp set.   A sweet twine bow adds a nice finishing touch.


That is it for me today! Here are links to the entire Design Team so you can hop along with us:


Thanks for joining us for the October Release! Don't forget about the October Inspiration Challenge!  I hope you will join in the fun for a chance to win a gift certificate and a guest design spot.

Thanks!!!!

Jill


Friday, October 14, 2016

Paper Sweeties October 2016 New Release Party


TODAY IS THE DAY!
The wonderful October Release is now available at Paper Sweeties

Welcome to our Release Party Blog Hop!

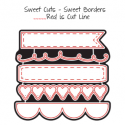
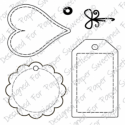
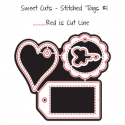
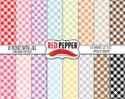
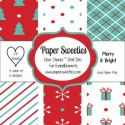
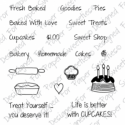
The new stamps and dies are as follows:

Basket Add-on: Baked with Love Sweet Cuts

 And in case you missed the news Paper Sweeties has also released its first patterned paper collection called Merry and Bright!

I just love these colors for the Holidays!

Plus some lovely holiday sequin mixes!!!!

Mistletoe and Winter Mix


 The entire Paper Sweeties team has gorgeous inspiration to share with you today!  Here is what I created:


This sweet red card uses the NEW "Merry Little Christmas" stamp set:
 I stamped this lovely sentiment and a snowflake to top it on a circle die cut using watermark ink and then embossed it with red embossing powder!  I then glued two additional circle die cuts to the back of it for additional dimension before adding it to my prepared card base. I edged the circle and the square panels with some glitter for a little Christmas sparkle!

  
Then I made a sweet coordinating treat basket with some lovely peppermint candies!  

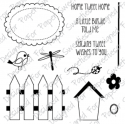
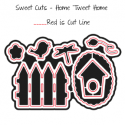
 I started with a clear cello bag and added the peppermint candies to it.  Then I tied the opening with some red satin cording and added a sweet scalloped tag from the "Home Tweet Home" stamp set with the sentiment "Holiday Treats" which is from the NEW "Baked with Love" stamp set.  
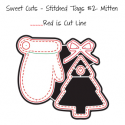
The basket was created with two basket die cuts from the new "Basket Sweet Cuts" and a piece of cardstock 5-1/2 inches long x 2-1/4 inches wide.  Score the long side at 1-1/2 inches from each end.  Score the narrow side at 1/4 inch from each end. Fold all score lines in and then cut small triangles at the 1 1/2 folds to create your basket.  Then you can use glue or score tape to assemble your basket-box.

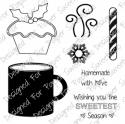
 I decorated the front of my box with some gingham paper and a sweet peppermint candy made with the peppermint stamp in the NEW "Baked with Love" stamp set.  I wrapped it in cellophane and tied two pieces of embroidery thread around each end to form a candy.  I think these would be sweet at a Christmas dinner table at each place setting.  An after dinner mint is always such a pleasure!

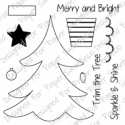
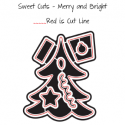
I then went on to create some gift tags using the NEW "Merry Little Christmas" stamps and sweet cuts sets once again.  I also used the tree die from the previously released "Merry and Bright" sweet cuts:

After stamping the "Have a Very Merry Little Christmas" sentiment I added a snowflake from the same stamp set to the top. 
 I stamped the kraft and white tags with red ink and then embossed the red tag with white embossing powder.  I also added a tree trunk and stand die cut from "Merry Little Christmas" to the bottom of each of the trees.   Some glitter, a few jingle bells and a red thread tie and these are ready for gift giving. 


 These sweet rusty jingle bells topping my tree tag are available at Paper Sweeties!  HERE

One last gingerbread basket tag....

On this gingerbread basket tag I used brown cardstock for my gingers!  I used a piece of holly for a hat on Mom and a scarf for a "tie" on Dad.  Each of the "kids" has two red pearl buttons. 

The "Fresh Baked Treats" sentiment is from the "Stand Add-On: Fresh Baked" stamp set which has a smaller font size perfect for the tiny tags in the "Beautiful Little Wishes" Sweet Cuts.  To decorate the tiny tag I added a red bow and a miniature gingerbread man cookie cutter from a bag of buttons in the Holiday Section at Hobby Lobby.  It's the little things that make me smile! :)

Thanks for taking a look at my projects!  I would love to hear what you think of these new Paper Sweeties sets?  Which is your favorite? What are you excited to create for the upcoming holidays? I hope you will share your creations with us on our Paper Sweeties Inspiration Page on Facebook!

Here are lovely links to all of our wonderful Paper Sweeties Sweethearts.  Wait until you see all of their WONDERFUL projects!:
 
I hope you enjoy hopping around to see everyone's creations!
Hope to see you tomorrow for the Release Rewind!
Jill 

NOTE: New Release products are linked at the top of this post in the "What's New" section: