Friday, March 29, 2013

Cheery Lynn Designs Challenge 73 - Celebrate

Re-post....my original blog post was lost!  When I logged in this morning only the comments were left...so....I tried to remember what I wrote and retyped it. 

Hi Everyone,
Here with a card for the Cheery Lynn Designs Challenge 73 - Celebrate.  The word "Celebrate" made me think of the Celebration of Easter which we will be enjoying this weekend with family and friends.

I needed a card for my son's Easter basket.  His favorite treat at Easter is the chocolate bunny which is delivered each year.  He just loves to bite off those bunny ears on Easter morning! LOL!  Because of this I wanted to make a card with a chocolate bunny on it...


 Here is the card that I made for him and a spare....


I used the scalloped oval stackers from Cheery Lynn Designs for my shaped card and mats.  The little bunny die is from Impression Obsession and is embossed with a new embossing folder to give it some texture.

 I used an Easter themed impression plate from Cheery Lynn on the mat beneath the bunny.   You can find it: HERE.
Thanks for taking a look at my cards.  Have a wonderful weekend!
:) Jill

Happy Easter


I wish you all a Happy Easter Weekend! Enjoy!

:) Jill

Thursday, March 28, 2013

Serendipity Stamps Challenge - A couple of step cards for babies


Hello,
Today I needed a baby card for a dear friend that is pregnant.  I made a boy version and a girl version based on the Serendipity Stamps Challenge #8 - Step Card.  It is the first time I have ever made a step card and I found it very easy and fun to do something different.  The tutorial from Splitcoast Stampers that is linked to the Serendipity challenge blog is very helpful if you have never made one before!

 This adorable baby booties stamp can be found:  HERE.  I used some copic markers to add shading to the images and to color in the bows.
 I also used a straight pin to poke small holes into the bootie along some stitching lines that are part of the image.  I like this addition and hope to remember to do this again in the future!  You might need to click on the picture to see it well...
  At the very last second of making this "girl" version I got a brown ink smudge on my white background by the image.  An eraser did not work this time for removing it and after pondering how to fix it since I had already glued everything down I decided to free-hand draw some hearts in a brown pen in several areas of the card.  I also added one down by the sentiment "Welcome Baby".  It wasn't what I planned for this card but mistakes happen to us all when we are stamping and you have to go with it....

Thanks for taking a look at my cards.  I hope you will join in the fun at the Serendipity Stamps Challenge blog and try out a step card.  They are lots of fun and I will definitely be making one again in the future!  Thanks for all of the wonderful inspiration Serendipity Design Team....and of course thanks for the beautiful stamps to create with!  :)

  Jill

Wednesday, March 27, 2013

Easter Wishes - a card for Freshly Made Sketches #79

Hello,
I am still trying to get a few more Easter cards finsihed.  I took inspiration from the Freshly Made Sketches challenge #79: HERE

Here is the sketch:

Here is the card I made:

 I was originally trying for a one-layer card - very CAS.  But...after using a circle mask and stamping the two lovely borders from one of the new WPlus9 sets I didn't quite know how to make the circle space look right!  Ugh! 

So.....after embossing the background and then deliberating and trying different things I finally cut this pretty pink felt circle frame and added the smaller popped up circle with the sentiment.  I also added some coloring with my copics to help the flowers in the stamped images to POP a little from the background.
All I can say is that the art of making a single layer card is one that I aspire to.....tonight wasn't my night for it but I do like my finished product.  I just love the texture that felt adds!  Yummy!

Thanks for taking a look!
Hugs,
Jill

I feel Merry....oh so Merry! And I love Glue Dots!

Edited to add:  So excited to have received a shout-out for this card!  You can see the post with all of the incredible entries as well as the shout-outs and this challenge's winner on the Festive Friday blog: HERE

Hi Everyone,
First I have some new followers to my blog this month and want to say welcome!  I am always so touched when someone decides to follow my little Greenwood Girl Cards blog. Yay!
 
I am feeling a little, all right a LOT, care-free today as my taxes are finally DONE!!!!  Yay!!!!  So relieved to have them finished after this very tough year....

To that end I was feeling very MERRY and decided to make a card that has been in my head since I saw this graphic and made my first round of "Merry" cards for FFC#4 on this post: HERE

Here is the graphic I am referring to at the Festive Friday blog:

Ever since I saw the graphic, at the very first moment, I just kept thinking "Christmas Ornament", "Christmas Ornament!"  And it was still in my head this morning when I woke up...anyone else wake up with card ideas in their heads???

So I made this:


The pretty red-music paper is a digital product from Crafty Secrets from one of their CD's.  I love, love, LOVE being able to print out as much of this paper as I need for Christmas Cards.  I hand-cut the ornament topper out of some kraft cardstock and cardboard paper.  Then I added some "Holly Berry" trendy twine from HERE tied up in a nice bow to embellish my ornament.  I made the card 5x5 so that the topper which extends off of the card front will still fit in a 6x6 envelope when it is time for mailing.  I also put glossy accents in the cutout space of each word.  It was not quite dry when I took the picture and I noticed that the inserts on my lower letter 'e' are shifting a bit in the photo but I didn't notice as I was actually taking the photo (of course)!  Soooo... just please ignore it as I am headed out the door and don't have time to re-take it today!  Just call me calamity Jill....

One more quick thing to share.....I love me some glue dots as I am sure many of you do too.  Thought I would share how I store mine:

 This little wood box was found at the thrift store in my neighborhood here in Seattle.  I saw it and the round curved inside, see next photo below:
 and knew that it would work perfectly to store my glue dots at home!  I have painted it several times over the past couple of years but the latest rendition is this pretty turquoise color.  I can't tell you how much time it saves me having a spot for each size of glue dot that I use - micro, mini, and craft. 


Thanks for your visit! 
You are in my thoughts Meredith....and your entire Family too!
Hugs,
:) Jill


Monday, March 25, 2013

March 2013 Papertrey Ink Blog Hop

Hi,
Here with a quick card for the March 2013 Blog Hop.


Here is this months inspiration:


It is all about the lovely and fun sequin!  I have been playing around with lots of ideas but I have only finished one card....and I am not to pleased with my background stamping/embossing or with the number of sequins that I sewed together in some vellum for my bunny to be resting on (to look like Easter grass and eggs).  Thought I would throw it out there anyway... Hoping I have time to post at least one more card before the end of the night but I am also trying to finish up some tax work so we will see.


Thanks for taking a look...
Hugs,
Jill


Saturday, March 23, 2013

Merry Monday Christmas Card Challenge #54: Snowman Theme....

Edited to add:  So excited to have received a shout out over at Merry Monday for this card among all of the incredible entries!  You can see the shout out post:  HERE if you would like to take a look at all of the beautiful cards highlighted! :)

Hello all,
Here with a very quick post as I am on my way out the door to Grandma's house to color Easter Eggs with the cousins.  Tim is so excited!!!

Yesterday I created a card for the Merry Monday Christmas Card Challenge #54: Snowman Theme

 Snowmen are one of my favorite things and yesterday morning we had a brief snow flurry here in Seattle which is a very, very rare thing!!!!  I wish the snow had stuck so we could have had a snowball fight but Tim and I did manage to make one snowball and snap a photo before school started!  Maybe I can share it in my next post if I get it uploaded to the computer!

Anyway...the snow inspired this little snowgirl card....I hand drew some eyelashes on her as I thought she should have long eyelashes to go with her boa!  This will be used as a special thank you note at Christmas Time....

The stamp set is called: Frosty and Fabulous Snowman and is from MFT....  

The stems and leaves for the button flowers on the left were made using Tag-its #5 stamp set from Papertrey ink....love those little $5.00 sets...they always have the best little stamps for adding special touches to my cards!!!
Above photo shows the copics I used to color the snowwoman if you are interested...I used a copic multi-liner to make the eyelashes...not shown.

The dies are from Cheery Lynn Designs - doily and scalloped and regular circle dies; and Lil Inker designs.  I am not sure what set that sentiment is from as this tag was already made and sitting on my desk from a previous card attempt!  PTI though I think!  Snow is made with glitter glue -  Stickles Diamond.  I have to add glitter to snowwoman cards - it is a must!!!

Thanks for looking at my card!
Hugs,
Jill

Friday, March 22, 2013

MIM#108 - Inked Backgrounds and some craft shelving for my stamps...

Hello,
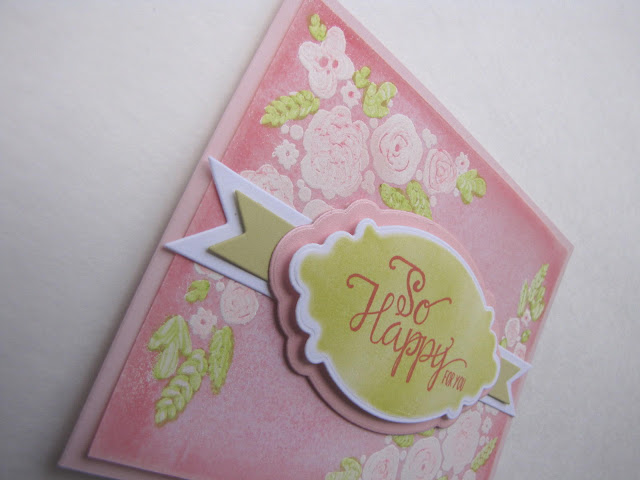
Here with a quick post for Papertrey Ink's Make it Monday #108 "Inked Backgrounds".  I needed a wedding card for my dear friend Kyleen who is getting married this weekend to her Rudy.

Here is what I came up with:

This photo taken outside while it was snowing this morning is the only one I like and shows the truest colors:


This photo (below) shows the whole card but the colors are a lot brighter than in real life - taken inside in my light tent:
 I embossed in white and then after inking the background with various pink inks I grabbed some copics in pinks and greens and colored the embossing....

Stamps:  PTI Mini Blooms.
Cardstock: Sweet blush and Linen vellum
Dies: all PTI
Copic Markers and embossing powder - white.

Continue reading if you are interested in a little CRAFT ROOM UPDATE and some new shelves and storage items:

Some of you know that I am working on re-organizing and purging my craft goodies.  For the first time ever I have a little bit more space to spread out in - in the basement of my house.  For a long time my space was very, very small - just a table and a small cart.  


One of the projects that I have wanted and needed is some shelving for my stamps.  This is one of the projects I have now completed.  I ordered and built two tall white CD/DVD storage towers from Amazon.com: HERE.  I wanted something very tall to use the vertical space in my room which is why I chose these.

I set one unit up to hold CD sized cases (the old style Papertrey Ink sets fit in here for example).  The other is set up to hold DVD sized cases.  I have many of my stamps from a variety of companies stored in DVD cases and they are now on the shelf next to my desk which makes them so easy to pull out and USE!!!

Here are some photos:
 I still have lots of empty spaces and open shelves left as my collection continues to grow over time.

 I purchased the turquoise baskets from the dollar store and they hold my smaller size sets - like the $5.00 sets from Papertrey Ink which I use all the time - shown in the photo below:
 These baskets are still mostly empty so I have lots of room to grow into them too and could even combine them more in the future if the space is needed.  I love how easy it is to pull a basket out and take it to my desk or just stand and flip through to get the set that I need.


I also put general label headings on each shelf that holds CD or DVD cases so that I know where to look for particular sets....see below:

I love how much time it saves to have everything labeled and sorted like this finally.  Before I had no space for shelves and had things stored in photo boxes under my little desk.  It was no fun getting down on the floor to try and find a set that I wanted to use.  The shelves on the other hand make finding stamp sets sheer and total BLISS!  It is just so EASY to find what I need! Space, organized and labeled space, really does make creating faster and more enjoyable.  

Here are a couple more organizational items I have been painting lately:
A small (6" round) two-tier basket I got in brown at Ross Dress for Less becomes bright with some spray paint.  I have found that in my dark basement bright colors are very, very, very welcome!


A straight on view...oops I see in the picture that I need to use a paintbrush to finish painting the wood handle....but you get the idea....it holds my fabric tapes and Washi tapes.  I have used them WAY MORE since I put them in here and set them on my new giant work table....

Below: Another item that sits on my desk and holds some of my wood-mounted birthday stamps.  These are some of the very first stamps I ever purchased when I started card making to help use up my scraps from scrapbooking. 

 I like to have birthday stamps out on my desk as sometimes I need a card or tag for a gift in a hurry and that way I can just reach up and use them!  So easy plus this little stand is like a 3-tiered birthday cake full of stamps to gaze at which is a gift to myself in inspiration every single day!  I love surrounding myself with things that make me smile!

 Here is a view of it at my desk - sorry about the lighting but this was taken this morning and that is the best I could do with the lights available and the snow falling down....
Okay - that is it for me...thanks for looking! 
Hugs,
Jill


Thursday, March 21, 2013

Merry, Merry, Merry....for Festive Friday, Friday, Friday!


Hi Everyone,
I am here today with some very MERRY cards for the Festive Friday "MERRY" Challenge: FFC04.  As soon as I saw the trigger I knew I wanted to use my Merry word die from Papertrey Ink with the tons of Christmas Paper scraps sitting in my scrap bin!!!!


I got into a card making zone last night after spending several free hours working on purging and organizing some of my crafty items. This zone allowed me to make three cards in the time that it usually takes me to make just one!  Love it when this happens!!!!!

This is the CAS card of the three.  I find CAS hard to do....I always seem to get ink on the card at the very end for some reason.  And I did this time too but a lovely white eraser came to my rescue!  Yeah!  
The snowflake is from Folk Art Flurries - WPlus9.  Love how it frames the word!  The embossing folder is from Lifestyle crafts...love those thin diagonal lines! 


 This is the most elaborate of the three.  With sewing (I cannot sew a straight line to SAVE MY LIFE - I think I will pre-draw lines with a pencil and ruler next time to see if it helps - its either that or go FAUX!!), lots of layers, and some lovely tiny rusted jingle bells added to the twine bow.  It uses Folk Art Flurries from WPlus9.  I used kraft and red ink on the snowflakes on the background and on the focal point.  Love this look and will probably try this again soon! 

This was the last card I made....and I am still not sure it is quite right. I started with an idea but it took a turn in the middle.....now I don't like the doily edge on the paper as I don't think it goes with the stars at all....

Also I think I need to put a brown pen line or maybe some red ink around the word  "merry" so that it doesn't look so lost?  It is when I look at photos of my finished cards that I most often see the glaring thing I didn't do even though I didn't notice it while creating in the first place.  I am debating with myself but I will probably do something (change everything about it!) before I ever give it a way.  I am posting it anyway as I think I learn from every single card I make - the good ones and the not so great ones.

This card uses PTI's Background Basics Postmarks and Layered Postmarks Holiday stamp sets.  I absolutely ADORE these two sets - alone or together!

Well that is it for this post....sorry for being so long-winded!!!  Thanks to everyone over at Festive Friday for the wonderful MERRY inspiration!  Love all of your cards!  And thanks too for my shout out from the last challenge with this card:  HERE .  If you didn't see last week's shout outs for Moriah and Sonya as well as all of the incredible "SNOWFLAKE" entries I hope you will go to the Festive Friday blog and check them out!  Also challenge three's winning card is a must see - it has incredible hidden depths!!!  Congratulations to Ardyth Percy-Robb who created it.  You can see her blog post:  HERE 

Bye for now...
:) Jill


Sunday, March 17, 2013

A "scene" for Easter....


  Hi Friends,
I made a little Easter "Scene" card this weekend and am going to post it to the Cheery Lynn Designs Challenge #71 - Easter: HERE

Here is my card:


 A close up of the fabric and felt bunnies:

I embossed the rustic cream cardstock with an Easter Impression plate (linked below) from Cheery Lynn. 
I am hoping that next year for Easter, Cheery Lynn will add some smaller size eggs and some baby bunnies to their die line-up.  Wouldn't a bunny family on a card be sweet?! 

Thanks for taking a look at my post.   I have linked most of the products I used below.  I used the sentiment frame set linked below on the inside of my card for a sentiment that says "Easter Blessings".  The picture I took didn't turn out and I am on the run so I don't have time to re-take it right now.   

Thanks for visiting my blog and taking a look at my card.  I so appreciate the time that people spend on commenting!  You always make my heart smile!
Hugs,

:) Jill


Tuesday, March 12, 2013

Festive Friday Challenge #3 - Snowflake

Edited to add:  So excited that my snowflake card below received a shout out among all of the incredible cards posted.  Thanks Festive Friday Team!  :)Jill


Today I took a few minutes to make a card for the Festive Friday challenge.  The inspiration this week is an element challenge: incorporate a snowflake into your design.  Here is the graphic:


The Christmas season is one of my favorites to create for.  You can tell how much I like it by the tons of pins on my Christmas board on Pinterest:  HERE

Today's card was inspired by several different pins on my board so I can't take credit for the design.  I tried to link to a couple of specific pins on individual websites but was having problems finding the original cards - bummer....

The kraft, red, and cream color combo is a favorite of mine for Christmas cards and I use it a LOT!!!  I love the old-fashioned vintage look that can be achieved especially when you distress edges with some kraft ink too!
 I used some vintage thread in my Janome Sew Mini today and did not have good luck with it.  It kept breaking and after re-threading several times I opted to just zig-zag a bunch of holes around my card to add to the home-spun feel that I like so much.  The sentiment is from "White Christmas" a stamp set from My Craft Spot.

A close-up of the snowflakes!  The large one is from WPlus9 and the small one from MFT.   I also impressed my kraft layer with a snowflake impression plate from Papertrey Ink. 

Thanks for looking at my card.  There is some truly incredible inspiration from the Festive Friday team on their blog: HERE
And a lot of wonderful projects have already been uploaded to the linky tool!  I am off to take a look!
I hope you join in too!  The deadline is tomorrow - March 13th 2013.

Hugs,
Jill

Monday, March 11, 2013

Seahorse Love!

Hello Crafty Friends,
Summer Vacation from school is around the corner....just 3 1/2 months of school left!  I always look forward to summer time and giving my son's teachers a special end of the year card wishing them a lovely summer vacation.  I was playing around this weekend with some dies I purchased a while back.  A family of Seahorses (I have always loved seahorses from the time I was a little girl) from Cheery Lynn Designs.  Here is the card that I came up with: 

Isn't it a cute family of Seahorses floating along!  I cut them out of the square of Aqua Mist cardstock first and backed the openings with patterned paper to create a shadow effect behind the seahorse diecuts.  I popped up the diecuts and shifted them to the left just slightly so the patterned paper "shadow" shows.  A touch of cheesecloth sprayed with various mists creates the ocean floor with some pearls and sequin shells.

Thanks for taking a look!
Crafty Hugs,
Jill


A card for the Cloud 9 March 2013 Blog hop

Hi friends,
Here tonight with a card for the March 2013 Cloud 9 Blog hop.  Here is the inspiration photo that inspired my card:

I love the idea of the vase of flowers as I wish I had some flowers for my table currently!  LOL!  I am just so very ready for spring and tonight I am sitting in the Seattle rain!  I also thought the background looked like watercolor flowers floating behind the vase.  I ended up trying to create some flowers that were lighter and darker by stamping more than once without re-inking.


I used stamps from the new Chantilly Trim stamp set and even cut a single flower from the flower border stamp to do some additional individual flower stamping.  I also masked the flower stem stamp and stamped it 3 times initially in two different color pinks.  But I am not sure that you can really tell in the finished product as I then over-stamped the images with lighter inked flowers for a faux water-color look.

The card base is embossed with the Chevron Impression Plate also from WPlus9.  The sentiment is from Fresh Picked.  I also added a little plastic wrap as a border on my vase as if the flowers were still in their wrapping.  I stamped the lovely background square from Chantilly Trim and cut the vase out by hand.  I thought the twine bow and felt heart were a nice finishing touch to it.

Thanks for looking at my card!  My laptop is in the shop so I am missing visiting everyone's blogs late at night in bed like I usually do....hope it is all fixed soon!  I really want to go see what everyone else has created so I may stay down in my cold basement for a few minutes more after posting this to go take a look!

Hugs,
Jill