Wednesday, August 31, 2016

Paper Sweeties Inspiration Challenge - September 2016


Hello and Welcome to the Paper Sweeties September Inspiration Challenge!  We have a wonderful color palette and inspiration photo for you this month!  I just love the bright colors and those mason jars!

I needed to send some hugs to someone special so I used the "I love you" stamp set to create this card:


I used the lovely "Abigail" and dressed her in the sweet nightgown which I paper pieced using my "Welcome Spring" paper pad from American Crafts. I added a touch of glitter to her bow and the collar and cuffs and slippers of her sweet coordinating pajama outfit!


  I also stamped and colored the sweet teddy bear so Abigail could hold it in her hand.  The sentiment fits so wonderfully with it! 
A few "Cupcake Sprinkles" sequins finish the card off nicely!  And I added a touch of black cardstock for some additional contrast which I felt the card needed.  This is an easy way to add contrast to a card if you feel it needs just a little something extra! 


If you are hopping along with our lovely Paper Sweeties Teamies this link list will help you on your way:

Beth Luetschwager  
Debbie Marcinkiewicz – Paper Sweeties
Nancy Penir
September Guest Designer:  Dawn Barwick

Thanks for taking a look at my card today!  I am back from my break from designing and excited to be playing with my Paper Sweeties stamps once again!  I hope you will play along with our challenge this month! We would love to see what you are creating!  Share your heART with us!
Crafty Hugs,
Jill


My annual Christmas Tag Post....

 Hello Friends,
If you have followed my blog for a while you know that every summer as time permits I start making Christmas tags to give as gifts to my family on Thanksgiving Day.  This summer I didn't get as many made as usual because of some health issues but I did get my tag designs started and I thought I would share with you what I have created so far...,.WARNING this is a LONG POST with tons of PHOTOS!

A tag design using the Tim Holtz Stocking Stuffer Bigz Die by Sissix:


The sweet Gingerbread Girl is from Paper Sweeties "Ho Ho Ho" stamp and sweet cuts sets. I colored her with Copics.  The pine fronds are from a die I have had for years not sure of the maker?  The snowflake is from Taylored Expressions I believe.  And the "warm winter wishes" tag sentiment is from Lili of the Valley stamps in the UK.  The "To and From" is from Papertrey Ink.

Next some lovely mitten tags from Waltzingmouse Stamps (now with Gina K Designs).  These are reverse stamps so I used my MISTI and two colors of ink (Pure Poppy and Cherry Cobbler) and stamped them 4x to get a great impression and add the second tone of ink around the edges of the mittens:
I love how this turned out!  I stamped the tags below on "Aqua Mist Cardstock" from Papertrey Ink.
 The "Holiday Hugs" sentiment is from the "Candy Jar Christmas Fillers" stamp set also from Waltzingmouse Designs.
 I love the two tones of ink and the red and aqua color combo!
And what are Christmas tags without jingle bells! :)

How about some snowmen tags?  Here is one I made for my son who LOVES everything Harry Potter:

 He is holding a wand made from a red/white piece of wire to look like a candy cane! :)  And the glasses I found at Hobby Lobby in their Paper Studio Gem section.

 These tags use the "Shape-Up" Series Snowman stamps and dies from Papertrey Ink.  The sentiment is from the "Candy Cane Christmas stamp set". 


I wanted a top hat for my snowmen.  This hat is from Paper Sweeties "Snow Friends Sweet Cuts" set.


This next tag was inspired by a tag that Debby Hughes created which I saw on Pinterest: HERE 
I was surfing Pinterest for tag ideas and also saw these ornaments where the deer's head was made with a heart-shaped button: HERE.  The heart shaped button along with Debby's tag inspired me to create these tags:

 I think next time I will draw in some eyelashes to highlight her green eyes!  The antlers are made with the Sissix Bigz Die called Snowflake 2.  The heart base is punched out from my lovely old heart scalloped punch.  Some buttons, bling and googly eyes along with a holly embellishment and these were done!  I am thinking about making more of these but possibly stamping a background on them or embossing them for more texture.  I love how quickly these can be made!  Punches are so fast!!!!

How about some more "punch" tags:


And some lovely stocking tags using a new Penny Black Die set called "Christmas Stockings" :
 I added some Stickles Diamond Glitter glue in the openings of the die cut for some sparkle!
 Here are some made with music paper!  Love this look...again inspired by Pinterest!
And if you know me then you know that I have to use red and green gingham papers to make my tags each year!  I love gingham for that homespun look!

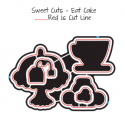
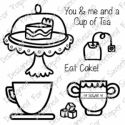
Speaking of Gingham...I call these next tags my "Cup of Christmas Cheer" tags!  I posted a tutorial on YouTube for these and I have never gotten to 1000 views on a video that fast!  I am a very amateur video maker so if you go look please be aware that tutorials are not my strong suit! LOL!

 Hot Chocolate is a very big part of Christmas and winter in general at our house.  I set up a hot chocolate bar every year complete with marshmallows and mini candy canes plus special Christmas mugs to drink it out of.  Tim has a cup almost every day after school with LOTS of marshmallows on top!  Just like these tags:
These tags use two sets of the marshmallows from Papertrey Ink's "Friendship Jar Holiday Fillers" stamp set.
The teacups are die cut from the Tim Holtz "Tea Time" Bigz die by Sissix.  The small candy cane is a little bits die from Taylored Expressions.  I think these are my favorite so far this year and I will be making more of them!

Here is a smaller hot chocolate tag using the mug from "Candy Cane Christmas" from Papertrey Ink and the marshmallow stamp once again but trimmed down to fit in this smaller mug:
I made the "Hot Cocoa" heart tag on my computer.

I also made a set of snowman tags like this one below that were inspired by a Pinterest image which I can't find right now.....will try to add it later...

 These use a retired Stampin Up "Two Tags" Bigz Die.  The hat is from the Papertrey Ink Shape-Up Series Snowman Die set once again.

The scarves are torn pieces of flannel fabric.  Love the frayed edges!


And here are some "Believe" tags using a Heidi Swapp die:
The sentiment "A Gift for you" is from Papertrey Ink's Friendship Jar Holiday Fillers once again!  (Linked above) The tiny tag dies are from Taylored Expressions.  The large tag was made by cutting a strip of kraft paper.  I left room at the top to wrap a strip of gingham paper from front to back to add interest. 

I started this long post with a stocking tag so I thought I would end with some stocking tags:

If you have made it this far....Wow!  This was a lot of pictures and a lot of tags!  I like to make this post each year as it is an easy way for me to look back at what tags I made the previous year.   I try not to make all of the same tags each year for my family members. I like to switch things up and keep it interesting since it is their Christmas gift from me!

Thanks for taking a look!
Happy Christmas Crafting!
Jill


Thursday, August 18, 2016

A special birthday card stamped with "Who's That Girl Plays Golf" from MFT for MFTWSC294

Hello Friends,
Here with a snail-mail birthday card for my sweet Mother-in-law Prilla!  She golfs every Wednesday with her golf-club ladies and is celebrating a birthday next week.  I wanted to use my "Who's that Girl Plays Golf" stamp set from My Favorite Things to create her birthday card in honor of her love of golfing.  Here is what I came up with loosely based on this week's sketch for the MFT  Weekly Sketch Challenge:


 I kept the card very simple and flat for mailing using the horizontal rectangle in the sketch as my jumping off point.  I colored the image with my Copic markers to match the piece of patterned paper I wanted to use.  I used a low-profile foam tape under the image panel to raise it just slightly from the scalloped white rectangle panel. 

And to add just a wee touch of sparkle I added some 3-D Glitter Liner from Viva Decor to the golf bag opening.

I took the horizontal panel at the bottom of the sketch to the inside of my card:
 I used a border die to add some interest and a "wavy" line.
Thanks for taking a look at my card!
Jill

Tuesday, August 9, 2016

Paper Sweeties 4th Birthday Party!


Welcome to the Paper Sweeties 4th Birthday Celebration and blog hop!

As an Alumni Designer for Paper Sweeties, Debbie (Owner and Illustrator) asked me to join the celebration of her company's 4th Birthday...and I, of course, said YES!!!!  So today I have some sweet cards to share with you all.......

First a very special card dedicated to Debbie to get this 4th Birthday Party started!!!

 I wanted to create a card to commemorate Paper Sweeties 4th Birthday and I had this idea to use cupcakes to count off each of the years that Debbie has been in business.  That idea sparked this sweet card.

 These sweet little cupcakes are from the Paper Sweeties "Birthday Banners" stamp set.  This set comes with coordinating dies to cut some beautiful birthday or celebration themed banners but I stamped and then hand cut the tiny cupcakes out of the cupcake banner stamp to use them on this card. 
 I used a pink and green color combo because I know it is one of Debbie's favorites. I colored the cupcakes with my Copic markers and then I added some Viva 3D Glitter Liner to the cupcakes for that sparkly frosting!

 I created the personalized sentiment on my computer and die cut it out with a circle die.  I love how this card turned out!


Next another celebration card or even a card for any special day....

I used the lovely "Eat Cake" stamp set to create this sweet cake stand with its yummy dessert!


 The sentiment "Have a SWEET Day" is from the "Sweetie Pie Stamp Set".  So cute!

 I added a border of crochet trim and tied a sweet bow with the same trim which I hot-glued in place.

Some heart embossing, gingham papers and a few "Sugar Sprinkles" sequins and clear bling finish the card off nicely!

I have a little bonus card to share today too:
This card uses one of Paper Sweeties Planner stamp sets called "Planner Series Checklist". 
I just love the little boy and girl in this set!! They are super easy to color and they each carry a sign that you can add sentiments to.  I arranged them standing on each other to cheer my friend on as she works to get better soon!  Love how this turned out!  I got the idea from one of my wonderful Paper Sweeties team members though I cannot remember which one as it was several months ago now.  Thanks to whomever it was that had this great idea! :)


 I added the sentiment "Feel Better Soon" from the "Feel Better Soon" stamp set.
I love how perfectly the words fit into the boxes!  :)

 The heart borders are from the "Sweet Borders" sweet cuts.  Love the detail this added to the card and the way it matches up with the small heart embossing that I did on the blue panel.  I had to add an extra heart to the yellow gingham panel because of a blotch on my card....can you tell where I added it on the first picture above?  Remember there are no mistakes in card making just opportunities! LOL!

There are lots of wonderful participants in today's blog hop!  If any of my links below are not correct you can see a complete list of participant links by going to the Paper Sweeties Blog:  HERE 


DESIGNERS' BLOG HOP LINK LIST:

Debbie - Paper Sweeties

Jeri Thomas

Jill Norwood

Jinny Newlin

Julie Tucker-Wolek

Kathy Schweinfurth

Larissa Heskett

Lilian Forsyth

Lisa Bzibziak

Lori Hairston

Mackie Robertson

Maria Patrick

Michele Henderson

Mynn Kitchen

Nancy Salkeld

Pattie Goldman

Tracey Kelly

Tracey McNeely


Every year on Paper Sweeties anniversary Debbie gives away a $100.00 gift certificate to her store via the  monthly Paper Sweeties Challenge:

Here is this month's wonderful inspiration graphic:


All you need to do is link up a card or project using this wonderful inspiration and you will be eligible to win BIG!  You can find all of the details on the monthly challenge post at the Paper Sweeties blog:  HERE

I hope you will join the Paper Sweeties Design Team from August 14 - 16th as they showcase the new products being released this month too!  Lots of fun going on at Paper Sweeties for the entire month!

Thanks for taking a look at my cards today and joining in the Paper Sweeties Birthday Blog Hop!  I feel so blessed to be part of all the fun this month!  Happy 4th Birthday Paper Sweeties! And may you have many more wonderful years in business Debbie!
Hugs,
Jill