Hello Friends!
Welcome to the October 2016 Release for
Today the entire team is going to share their SNEAK PEEKS of the fun new stamps and dies for October! All of the products we are showcasing will be available for purchase on October 15th in the Paper Sweeties store! I am in LOVE with this FABULOUS release and I think you will be too!
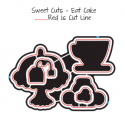
My first card is perfect for sending hugs to someone who needs a little pick me up! I used the new "Basket Add-On: Baked with Love" stamps and dies to create a little gingerbread man. I heat embossed the gingerbread men image which is a set of 5 gingerbread men (or women) depending on how you decorate them. I used "brown sugar" embossing powder on kraft cardstock. Then I hand-cut the last gingerbread man on the right side of the diecut to end up with a single gingerbread man . I added some glitter enamel dots for buttons, a felt scarf, and some pink cheeks to my little man's face to finish him off. I then created a mug for him to stand up in by using the teacup from the "Eat Cake" Sweet Cuts and trimming the saucer off by hand. The heart on the "mug" is 3 hearts (glued together for added dimension) from the heart border in the "Sweet Borders" die set. A coating from my Wink of Stella clear glitter pen adds some sparkle to the heart and to my sweet little gingerbread man.
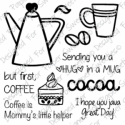
I created a scalloped window opening with a circle die and added a plaid paper circle to the inside for the gingerbread man and mug to sit on. The sentiment is from the "But First Coffee" stamp set and is a favorite of mine!
Next I have some tags to share with you. They use the Basket stamp and die and the "Basket Add-on: Baked with Love" stamps and dies. I LOVE THESE SETS!!!!!!! So many fun possibilities!
I stamped and die cut the basket and then added watermark ink and clear embossing powder to give it some shine! I then glued two additional basket die cuts to the embossed basket for added dimension and stability of my tag. Next I heat embossed the sweet gingerbread man stamp on kraft cardstock with white embossing powder. I added some skin pink Copic marker for cheeks and some red gems for buttons along with a red bow tie around one of the gingers necks.
Some black pen dots add a little bit of dimension to their eyes! The sweet scalloped label on the basket is from the "Home Tweet Home" stamps and sweet cuts. The sentiment "Baked with Love" is from the new "Basket Add-on: Baked with Love". The hearts are from the "Tree of Life Add-on Spring" stamps.
A snowflake flannel fabric strip was tied into a bow around the basket handle for some softness. The last detail was a sweet holly sticker from my stash. I love how this tag turned out and can just imagine it tied to a package of cookies or treats for the upcoming holidays!
Next I use the Basket Die Cut in a completely different way - upside down as a hat for a snowman!
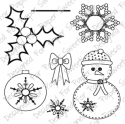
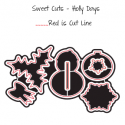
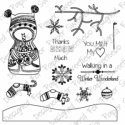
I started by die-cutting the basket from black card stock and painting it with Deco Art Ultra Fine Glitter Paint in "Ice Crystal". It dries quite quickly. I then die cut the basket again out of white card stock to get the insert piece for my snowman's face. To create the face I used a carrot nose button from my stash, though a piece of orange card stock with some black lines would work just as well. Two black rhinestones for the eyes. And a line stamp from the "Holly Days" stamp set to create the mouth. I used a Copic multiliner to add some eyelashes, eyebrows and mouth lines. A Prima chalk pencil created the cheeks along with some Stickles glitter glue. I used some scotch tape to hold the white snowman face inside the black basket. I placed the tape on the back side and then added a second basket die cut in white to the back to cover the tape up and make the back of the tag look nice. I decorated the hat with the Holly stamp and Holly Sweet Cut from the "Holly Days" sets. I colored the holly die cut with Copics and added three red gems for the berries. The "You Melt My Heart" tiny tag was created with a sentiment from the "Thanks Snow Much" stamp set and the heart tag from the "Beautiful Little Wishes Sweet Cuts". I colored the heart with a red Copic marker. Some ribbon and a bow complete this sweet tag set! One of the sets of ribbon and bow is made from torn fabric. I just love how these turned out!
Whoo! Thanks if you made it this far! That is it for my "Sneak Peek" post! Here are all of the links to the Paper Sweeties teamies for today's AMAZING blog hop:
I hope you will join us tomorrow for our Release Party and tons more inspiration!
Enjoy my dears!
Jill
NOTE: New products are linked in the "What's New" section at the top of this post. Existing products used are linked here:


These are all amazing! Each one is really sweet! I can't believe how many wonderful creative ideas you have!
ReplyDeleteWow!!! Awesome projects, Jill!! Love the ginger in the cup...so fun! Super cute ginger tag, and just LOVE the creative snowman in the upside down basket!!!
ReplyDeleteAwww, what awesome projects, Jill!! I LOVE gingers, and I LOVE snowmen, so these really steal my heart! Your upside-down basket snowman head idea is just brilliant! Love your creativity!
ReplyDeleteSo many cute ideas!!! How did you come up with the upside down basket for the snowman!!! What a fantastic idea!!!!
ReplyDeleteSuch fun and wintery products! Your snowman with the chin strapped hat is just so creative and sweet! It seems like forever ago when the kids were that little! The little gingerbread in the cup is, again, so sweet, and who wouldn't want a basket full of them! Wonderful projects, Jill!
ReplyDeleteOh wow did you ever rock this release!! These are all delightful Jill, so cute!!
ReplyDeleteYou are the Queen of the Tag for sure! These are also all very beautiful! And that coffee cup card... adorable!!
ReplyDeleteAwesome creations, Jill! Totally love the upside down basket snowman! Genius!!!
ReplyDeleteOh my, all those gingies make me smile! I adore how you turned the basket into a snowman hat! Your creativity knows no bounds :)
ReplyDelete