Friday, December 11, 2015

Holiday Coffee Lovers Blog Hop


Hello Friends,
I am thrilled to be joining in the Holiday Coffee Lovers Blog Hop today!!!!

The hop runs from December 11 thru December 18th and there are so many wonderful sponsors and prizes!  I hope you all get a chance to play along!
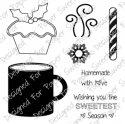
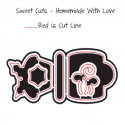
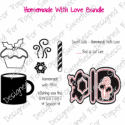
Paper Sweeties is sponsoring once again!  Yay!  The flash prize is the "Homemade With Love" stamps and sweet cuts:
 And Debbie is also giving away a $25.00 Gift Certifciate:

 For more information about this fantastic event please go: HERE!


Here is my card using the lovely "Homemade with Love" stamps and sweet cuts:

 I paper-pieced the sweet mug and cupcake or Christmas Pudding and added some wink of stella for a glittery look!

I used the snowflake in the set to create my glittery marshmallows and also added a green peppermint stick!
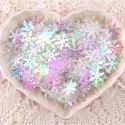
A snowflake sequin decorates the mug with just a touch of Mercury Glass Stickles in its center.

Isn't that Christmas Pudding adorable!  I cut an extra set of leaves and popped them up for some added dimension! And I added my sentiment with some black glitter letters I had in my stash.  The paper which is from Simple Stories already had the word "Joy" in place as well as the adorable little stars sprinkled around.  I finished the card off by adding some snowflake stickers I had from KI memories.  Then I roughed up the edges of the paper panel with my scissors and inked the edges in "rich cocoa" ink which was very appropriate I thought! :)  I added it to a red card base and called it DONE!

A big thank you to Amy and the entire team that works on these fabulous hops! And Happy Holidays!
Now I am off to go have some cocoa myself....yum!!!!
Hugs!
: )  Jill


Sunday, December 6, 2015

Paper Sweeties December Release - The Twelve Days of Christmas: Day 6


Welcome to Day SIX of the Twelve Days of Christmas Designer's Blog Hop for Paper Sweeties!  Have you been following along with all of the GORGEOUS projects posted so far by the Sweeties Teamies?  Wow - lots of wonderful ideas for holiday crafting my friends!!!!  If you missed any of the posts here is the link list:


Day 2:  December 3rd:  Maria Patrick

Day 3: December 4th:  Nancy Penir

Day 4:  December 5th:  Kathy Schweinfurth

Day 5:  December 6th:  Mackie Robertson

Day 6:  December 7th:  Jill Norwood (You Are Here)

Day 7:  December 8th:  Michelle Bala

Day 8:  December 9th:  Michele Henderson

Day 9:  December 10th:  Larissa Heskett

Day 10:  December 11th:  Jeri Thomas

Day 11:  December 12th:  Angel Johns

Day 12:  December 13th:  Mynnette Kitchen


Each of the posts so far have been amazing!  I have been working right up to the last minute to prep my items for today so let's get started!!!!
First up are projects using the Merry and Bright Stamps and Sweet Cuts:


I absolutely adore these sets and had a hard time putting them down once I got started....here are my projects:

First a sweet little Christmas card:


I just love the shape of this sweet tree!  And Debbie thought of everything you might need to decorate the tree!  I love the little pot that you can stamp to stand the tree in and I used it here on this card!  So adorable!

Next up some Christmas Tree tags:
 These tags were so easy to put together!  I just die cut the tree 4 times.  Twice from a glittery white cardstock and twice from the mint patterned paper.  Then I layered them and glued together adding a hand cut tree stump. NOTE: Their is a stamp and die for a tree stump but I did not use it on these tags.  I added two die cut stars back to back at the top with pop dots for some dimension and then a little glitter glue for sparkle.  You could add sentiments to these if you wanted but I kept them simple and sweet!

This next project is so fun and versatile!  Tiny CHRISTMAS TREES!!!!  Think name cards for your Christmas table....or to add to a Christmas scene in your home...or on your window sill by your sink just for fun...

It is hard to see in this photo but these are dimensional trees I made by scoring 3 (cream tree) or 4 (green tree) die cuts down their centers and then gluing them together to form a three-D tree.  The "Merry and Bright" tree die is not perfectly symmetrical so I added glitter glue and loose glitter to the edges of the tree so you can not see the portions that are slightly offset.  If you decide to make these I feel that it works best with 3 die cuts instead of 4. The offset areas are much smaller on the cream tree which was made with 3 die cuts only.

To create the tree stand I used a small wood spool (mine are from Maya Road) and added crocheted trim with some hot glue.  I also added Diamond Stickles and loose glitter to the top and bottom edge of the spool.  I used an extra long toothpick to create the tree stump and hot glued the end into the spool stand.  At the top of the tree I used a pin and a rusty jingle bell to create a topper.  You could also use the star that comes in this set for your topper.  I just liked the contrast of the bell and it allows me to add a sentiment to the top if I wish on a little flag.

Here is what it looks like with a name added for your Christmas Dining Table...a tiny tree place card:


I just think these would be adorable at each place setting for Christmas Dinner this year don't you?!  And it only took me a few minutes to make each one!  To add the names for my sample trees in the photo above I used the names that come with the  "Emma" and "Sophie"  dolls stamp sets at Paper Sweeties but it would be very easy to hand stamp names with the Paper Sweeties Alphabet stamp sets (linked below).

Here is a photo with me holding the tree so you can see the dimension a little bit better:

Ok....I have just one last project to share using the Merry and Bright Stamps and Dies:

I made a large rosette ornament or bag decoration!  I love rosettes and their beautiful dimension!  They are simple to make and every time I add one to a gift bag the recipient goes crazy!  They just make people smile!  Since I already had a couple of tags made I thought I would also make a rosette to add to a white gift bag I have on hand.  Now I am all ready to give a gift to someone special! And this rosette comes with a thread hanger so that if the recipient wants they can add it to their tree as an ornament.  I have also seen them used as tree toppers by adding a clothespin to the back.  Just clip it right to the top branch of your tree!

Here is a detail shot just for fun:

Okay are you still with me?  I am moving on to the other new stamp and die set that was released this month called "Sugar and Spice":


Do you love Gingerbread men as much as I do?  They are a favorite of mine for sure!  As soon as I saw this set in my design team package I knew that I wanted to make Christmas Ornaments with it!  A sweet Gingerbread Boy and Girl!  And here they are:

I used wool felt in a light beige shade for my gingerbread ornament bases.  I sewed the bases together 3/4 of the way and then added some quilt batting to the insides before sewing them closed.  I then used some fabric scraps, buttons, felt die cuts from the sweet cuts set etc. to embellish my ornaments.

Here is a close up of the girl ginger:
 She has a die cut felt bow with a rusty jingle bell, googly eyes, a sewn mouth and nose in red thread, a fabric scrap scarf and red buttons. The cream felt "frosting" zig-zags were made by cutting pieces from the die cut border in the Sugar and Spice Sweet Cuts set. A gingerbread cabochon adds a sweet baby ginger to her arms! And to finish her off I sprayed her lightly with glue spray and dusted her with clear glitter for some sparkle!  Adorable right?!

Next...our handsome Gingerbread Man!  He is also sporting googly eyes and a red thread sewn mouth and nose for his face.  He has a handsome plaid scarf made from a fabric scrap and some green buttons along with a walking stick "candy cane" that I had in my stash of Christmas Crafty Goodies!  At his back you can see the red thread hanger that I added.  I sewed a thread hanger in place on both of these sweet ginger ornaments so they can be hung on the recipients tree!  I love how these turned out!  They do take a bit of time to make but I did most of the sewing while watching a couple of Christmas movies on the Hallmark Channel so it went by pretty fast!

Well that is it for me today!  I was hoping to add one more gingerbread man project but I am down with a horrible cold that my son brought home on Wednesday.  It is Saturday evening as I am typing this post and it  needs to go live on Sunday night so I decided to post what I have done for now in case I can't finish it.  

 The lovely news for all of you is that there is lots more inspiration to come!  Tomorrow for Day 7 you get to go visit the wonderfully talented
  Michelle Bala 

I am having so much fun checking out each new post in the morning with my cup of coffee or tea!  And speaking of Coffee and Tea don't forget to start creating for the:
 Paper Sweeties is sponsoring once again and is giving away a couple of prizes including a $25.00 gift certificate and a flash prize of the lovely "Homemade with Love" stamps and sweet cuts!  Join in the fun December 11 - 18th!  More info can be found here:   http://coffeelovingcardmakers.com/


I am also linking this post to the "Visions of Sugar Plums" - Christmas/Winter Challenge #2  at my lovely friend Lori Hairston's blog over at ChouxChoux Paper Art!  Lori shares such wonderful creativity all year long and then does an incredible 3 day Christmas Blog Hop each year with her friends to share tons of Christmas and Holiday Inspiration!  There are lovely sponsors and prizes too!  I hope you will go and check out the hop and her challenge and her lovely blog full of fun ideas.  She is also on YouTube


Thanks for looking at my Paper Sweeties projects for this lovely Twelve Days of Christmas Blog Hop!  I wish you all the joy and fun of creating lots of fun crafty projects this December!  Happy Holidays and Merry Christmas to you all!
Hugs!!!!
Jill


Tuesday, December 1, 2015

Paper Sweeties December Release - The Twelve Days of Christmas

Paper Sweeties December Release - The Twelve Days of Christmas!

December 3rd:  Maria Patrick
December 4th:  Nancy Penir
December 5th:  Kathy Schweinfurth
December 6th:  Mackie Robertson
December 7th:  Jill Norwood
December 8th:  Michelle Bala
December 9th:  Michele Henderson
December 10th:  Larissa Heskett
December 11th:  Jeri Thomas
December 12th:  Angel Johns
December 13th:  Mynnette Kitchen


Hello Friends!  We are doing something a little bit different for the Paper Sweeties release this month.  
First of all...the new products are available in the store right now for purchasing!  Yay!  You can shop to your hearts content without a wait!!! 
Second....Instead of everyone showing their projects over a 4 day countdown as we usually do we are instead having a "Twelve Days of Christmas" blog hop.  One member of the Design Team will show all of their projects on their assigned day. Twelve wonderful days of Paper Sweeties inspiration for the "Twelve days of Christmas Blog Hop"!  

My day is December 7th!  This post will be updated with my projects on that date!  I hope you will come back by to see them.  And if you are here before that date just click on the links above to go and visit the posts that are already live starting with our lovely Paper Sweeties Creator: Debbie Marcinkiewicz!  

Happy Hopping and a very Merry Christmas and Happy Holiday Season to you all!  
Jill

Monday, November 30, 2015

Paper Sweeties December 2015 Inspiration Challenge AND Release Day!

Hello!  Are you ready for December!  It is hard to believe that we are in the last month of 2015!  Where did this year go? 

I am here today with a card for the Paper Sweeties December Inspiration Challenge:

Challenge #38 includes as always the chance to win a $20.00 gift certificate to the Paper Sweeties store and an opportunity to Guest Design!  I hope you will play along!!!

We are also having an early product release for the month of December.  More info about this on a post that will be up on my blog tomorrow!  The stamps and dies I used today on my December Inspiration Challenge post are part of the brand new products that are in the store as of December 1st! 

 Here is what I created:

I was inspired by the lovely wooden sign and warm tones in the inspiration photo.  I added the gold color by inking my background in yellow because I wanted it to look like the tree was all lit up! I used the brand new "Merry and Bright" stamps and sweet cuts dies to create this sweet Christmas card.  I love the shape of this new Christmas tree!  Isn't it adorable?!  And wait till you see the stamps and sweet cuts sets in full!  Lots of wonderful accessories are in these sets to use to decorate the tree.

 The banner shape that I used to hold the sentiment "Trim the Tree" on my card is from the "Hello Friend" stamp set.  It is definitely a favorite!

A few "Strawberry Sequins" surround the tree to add a punch of color.  They look like red ornaments ready to adorn the branches....

Well that is it for me today but all of the Paper Sweeties designers have lovely projects to share with you too:


Debbie Marcinkiewicz – Paper Sweeties
December Guest Designer:  Tracey Kelly

I want to extend a very special welcome to Michele Henderson who is the newest member of the Paper Sweeties Design Team!  You will love her fantastic design style!  Welcome aboard Michele!!!!  And also a very special welcome to our December Guest Designer:  Tracey Kelly!!!!  Tracey makes the most incredible scrapbook pages!  Love her artwork!  I hope you enjoy looking at all of the wonderful inspiration everyone has prepared!!!! 
 
And don't forget that Debbie is releasing the new products for this month early!!!! They will be live in the store on December 1st!!  Two new stamp sets with coordinating sweet cuts!  The cutest tree and gingerbread EVER!!!  Be sure to go to her blog at  Paper Sweeties for all the details! 

In conjunction with the early release we are having a "12 Days of Christmas" blog hop in December with a different design team member posting their creations each day from December 2nd to December 13th!  There will be wonderful NEW inspiration each day using these new releases as well as a mix of existing products!  It should be a lot of fun!!!  More on that tomorrow!
:) Jill


Saturday, November 21, 2015

Your Next Stamp Feature Day: CHRISTMAS


Hello Friends.  Here today with a card for Your Next Stamp's Feature Day.  November's theme is: CHRISTMAS!  My very favorite time of the year to create for!

Don't forget to visit the Your Next Stamp Blog and leave a comment for your chance to win!!!

I decided to create with the new Gingerbread Men Die Set:


I love this sweet gingerbread couple and made a set of die cut "cookies" to place on my card.

I die cut the boy and girl several times each and glued the layers together to create a very dimensional gingerbread boy and girl "cookie"!  Then I decorated them with the additional dies included in the set and added glossy accents over the top to make them all shiny! I used a micron pen to add their face details after the glossy accents had dried.

The sentiment is from the "Hot Cocoa Phoebe" stamp set and I thought it was perfect with my sweet couple!  I placed them on some die cut hearts on top of a stitched tag from the "Winter Fun Tag Die Set"  and then added a piece of the "Stitched Loop Border Die" to decorate the tag. 


Thanks for visiting me today and joining in the fun of FEATURE DAY at Your Next Stamp!  I have had a wonderful time as one of the November Guest Designers!  This is my last card!  A big thank you to Karen for allowing me to play along this month with her outstanding design team!  And to Julie who helped me along the way!  I sure love the Your Next Stamp products! So many wonderful stamps and dies to play with! 

:) Jill

Thursday, November 19, 2015

YNS Challenge #27

 Hello Friends!  I am back again today as a guest designer for the month of November with Your Next Stamp!  Today I have a card for Challenge #27.  Here are the sketch and color inspiration graphics:   


Remember you can choose to use the sketch or the colors or BOTH if you would like!  I chose to use the sketch this time....and here is what I came up with:

I inked up and colored with Copic markers a sweet new stamp set called "Sit, Stay, Drink".  It has the cutest little puppy in it....

 Isn't he adorable?  I just love the way he is balancing the wine on his head...or almost....

And the sentiment continues from the outside to the inside of the card.....

Here is an image of the stamp set in full....it was part of the November Release!


More inspiration for Challenge #27 can be found at the Your Next Stamp Blog!  I hope you will go take a look and if you have time join us in the challenge! There is a lovely prize up for grabs! 

:) Thanks for your visit and sweet comments! Hope you are having a wonderful week! 
Jill

Sunday, November 15, 2015

Paper Sweeties November Release Rewind

Welcome to our Release Rewind day for Paper Sweeties!

Once again it has been a fantastic release full of absolutely amazing projects by the entire design team!  I hope you didn't miss a single one!  I always get so many wonderful ideas I want to CASE (Copy and Steal Everything) after seeing everyone's fabulous projects!


Today we are sharing projects using the new stamps with some of the existing stamps and dies.  I decided to create a lovely Advent Calendar or "Countdown to Christmas" using the new "Days Until" stamp set.  I created 25 decorated bags of small toys and goodies for my little one to enjoy throughout the month of December as we count down to the big day!  This project took some time for me to put together but will be so worth it during the month of December when he has a bit of holiday cheer each day before he sets off to school!  I had a lot of fun dressing up the bags using lots of wonderful Paper Sweeties products!  Here are a few examples of the decorated bags:

All of the numbers for the countdown were stamped using the square frame and numbers that come in the  new "Days Until" stamps and sweet cuts.  I attached the number tags to a small candy-cane striped clothespin by American Crafts that I picked up at Tuesday Morning.

For this very first day of the countdown I used the beautiful flourishes stamped in black ink with the sentiment added between.  I used an oval die to trim it into a small sign.  The lovely gingerbread girl and boy were then added on either side.  They are from the stamp set "Ho Ho Ho". 

  This set of bags for day 4 and day 21 use the "Snow Friends" stamps and dies to create the wonderful snow girl and snow boy!  The heart that the snow girl is carrying is from the "Beautiful Little Wishes" sweet cuts.  The sentiment is from the Stand Add-On: Manger stamp set.


Day 5 and 11 use the lovely "Mason Jar" stamps and dies as well as the Stitched Tags #2 stamps dies for that sweet mitten.  I also added some "green apple" baker's twine.


Days 10 and 19 use "Stitched Tags #2" and "Stitched Tags #3" for the tree and stocking.  Each also uses a heart die cut from either "Beautiful Little Wishes" or "Snow Friends" sweet cuts.  A little glitter and diamond stickles were also used.  And for all of the other days I repeated these same icons over and over again until I had a bag decorated for all the days....with the exception of Christmas day.....

 Here is Day 25 or Christmas Day!  I used the "Stand Add-on Manger" stamp set to create my scene and placed it on a red paper rosette.  I am just realizing that the star I added to the top of the stable must have fallen off before I took the picture!  Oops!  I will try to find it and re-take the picture.  It is funny how you don't notice things until you are uploading the photos to the blog isn't it?

Are you still with me!  That was a long post!!!!!  One last thing before you go....have you checked out the new "Sweet Chips" kits in the Paper Sweeties shop?  Debbie added a brand new product line to her shop in November!  They are adorable!!!!  I linked to them in the Thumb Linky list at the end of this post if you want to go check them out! 


Here are the links to the rest of the wonderful Paper Sweeties designers for today's Release Rewind Blog Hop:


Thanks so very much for joining us for the November Release!  I appreciate all of the lovely comments on my projects!  I read each and every one!

  I hope you will share your projects with us for the monthly challenges over at the Paper Sweeties Blog as well as on our Paper Sweeties Inspiration page on Facebook!  

:) Jill


Saturday, November 14, 2015

Paper Sweeties November Release Party

Happy Release Day at Paper Sweeties!
Today all of the wonderful stamps, dies, and supplies we have been featuring on our projects are available at Paper Sweeties!  Yay!!!!

Here's "What's New" at the store:


My project today uses the lovely new "Stand Add-on: Fireplace and the "Dear Santa" sets.  I was inspired to create my lovely "Tuscan" colored background by one of my Paper Sweeties Teamies Maria!  The card I was inspired by can be seen on her blog Maria's Merry Makings:  HERE.  She created it for the November Inspiration Challenge which runs through the end of November on the Paper Sweeties Blog.  I fell in love with her beautiful card and the gorgeous inked background seemed perfect to go with my fireplace scene card.

The stockings and that sweet sentiment are from the "Dear Santa" set and look just perfect with the fireplace.  I added some of the new "Mistletoe Sequins" as a little home decor in this lovely living room!

Thanks for taking a look at my card today.  And thanks to Maria for inspiring that pretty background!
Now I get to send you off to see more inspiration from the wonderful Paper Sweeties Designers:

 
I hope you will come back and join us tomorrow for our Release Rewind day!
:) Jill


Friday, November 13, 2015

Paper Sweeties November Release Countdown


Welcome to Day 2 of the Paper Sweeties November Release Countdown!  All of the new products the Design Team are showcasing will be available in the Paper Sweeties shop on November 15th!

Today I have some Stocking Tags from the Stitched Tags #3 Sweet Cuts to share with you.  Remember this set has both a Present tag and a Stocking Tag along with a stocking hanger die.


I die cut the tag 3 times - once from red card stock, once from cream felt, and once from red gingham paper.  I used a heart die from the "Snow Friends Sweet Cuts" to create my heart aperture or window.  This time I decided to just add some "Diamond" stickles to the opening and not add a sentiment.  I cut the top and bottom portions off of the cream felt stocking die cut to create the cuff and toe pieces for the stocking.  I love the texture this adds to the tag.  I then used the stocking hanger die to add the hanger in red card stock and sandwiched it in between the red stocking die cut and the gingham stocking die cut.  A pretty red bow finishes each tag using Christmas ribbons I purchased at Hobby Lobby.

The center tag in this photo is created the same way. The only change I made is for the window opening. I used the snowflake die from the "Snow Friends" sweet cuts to create the aperture.

Thanks for taking a look at my project today.  There is lots more to see on each of the Design Team members blogs.  Here are the links:


I hope you will come back tomorrow for Release Day!  All of the new products will be available in the Paper Sweeties Store!!!

Thanks so much!
:) Jill


NOTE:  New products will be added to this thumblink list on November 15th after the products go live on the Paper Sweeties Website.


Your Next Stamp Diva Dare - Patterned Pizazz!

Today I am joining along as one of the November Guest Designers with Your Next Stamp for the Design Team's Diva Dare Challenge!  I hope you will visit the  YNS blog to link up with everyone that is playing along! And don't forget to leave a comment on the YNS blog for a chance to win!

The challenge this month is called "Patterned Pizazz" and the challenge is to use at least 3 patterned papers on our projects!  What fun!  I love patterned paper so this was a lot of fun for me.  Here is what I came up with:

I cut about 20 1/2" strips of scrap papers and then pieced them together with tape runner onto a piece of copy weight paper.  Once I had finished I had one large piece of striped paper in a repeating rainbow of patterned papers!  From that paper I die cut several sets of mittens using the wonderful  "Winter Mitten Die Set".   I used just one set of the mittens to create my card for today:
 I embellished the mittens using die-cuts from the ric-rac and snowflake dies that are included in this set.  The sentiment is from the new "Ice Skating Phoebe" stamp set and is stamped in chartreuse ink. 

A pink gingham ribbon creates a holder for the mittens which were placed on some circle die-cuts in Aqua and Pink.

Here is a picture of the Winter Mitten Die Set: 

I hope you enjoyed looking at my card!  I sure enjoyed reading all of the lovely comments on my release day post!  I am so enjoying my guest design month with Your Next Stamp!  How wonderful to get to work with their fantastic products that I love so much! And a Design Team that totally inspires!!!

Enjoy the rest of the hop!  (click here to go to theYour Next Stamp Blog)  And don't forget to leave a comment when you get there for a chance to win!!!
Thanks and Happy Hopping!

:) Jill