Hello Friends and welcome to Sneak Peeks of the January 2017 New Release for Paper Sweeties!
You are going to absolutely LOVE the wonderful stamps and sweet cuts that are being released this month! I have not stopped playing with them since I received them! They are just so sweet and versatile and fun!
Several people have recently asked how and where I get my ideas for my projects and cards so I thought I would share a little of my creative process with you this release. I started the card I am sharing today by browsing some "patchwork house" pins on Pinterest. I love quilting and "prim" or old-fashioned inspiration and draw many of my card ideas from these areas of creativity. There were so many beautiful patchwork house quilts and other types of artwork that I drew inspiration from while on Pinterest. Here are two pictures (and their sources) of the many that I was inspired by:
Source: HERE
SOURCE: https://www.pinterest.com/source/lolenya.gallery.ruAfter viewing inspiration on Pinterest I usually have a half dozen or more ideas in my head with more to come. I keep a notebook and a pen near me during the day to jot ideas. I also keep it on my nightstand because often times the best ideas come when I am relaxing before going to sleep. This time I had two sketch pages full of ideas for creating cards and projects. Here is a picture of one of my "sketching" pages. Keep in mind I am just scribbling the idea down so I don't forget it. I have found that if I don't jot a quick sketch or note to myself I will often forget my ideas before I have time to begin creating. LOL!
When I finally have time in my studio to create I grab my notebook and start making projects. For this card I used the idea of creating a patchwork house in the lower right hand corner of the page. This is not a new technique by any means but it is a fun one and I thought it went perfect with this month's "home" themed release.
I started by paper-piecing the BRAND NEW house sweet cut using 4 different patterned papers. I die cut the house 4 times - once from each type of paper. Then I held the 4 die cuts together and cut them in 4 pieces. I glued the pieces onto 4 more house die cuts cut from white card stock to create 4 sweet paper-pieced houses. I used one of the 4 houses to create this card:
I embossed 1/2 of a dark brown A2 card base with a tiny hearts embossing folder and added a nice beige patterned paper to the other half. I then tied some lovely Paper Sweeties Mint Seam Binding around the card base into a bow at the top of the card. A vellum and patterned paper die cut panel along with some corrugated cardboard trimmed with my pinking sheers creates a sweet backdrop for this adorable paper pieced house!
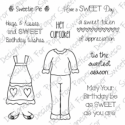
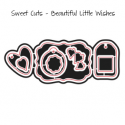
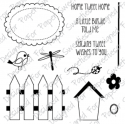
The heart-shaped tag is from the Beautiful Little Wishes Sweet Cuts while the sentiment is pieced together from two different stamps. The word "home" is from the sentiment "Home Tweet Home" in the "Home Tweet Home" stamp set. And the word "sweet" is from the "Sweetie Pie" stamp set. I often cut apart stamps to create the sentiments that I want on my cards. From this set I used the "tis the sweetest season" sentiment stamp to get just the tiny word "sweet" but you could also selectively ink the needed word for your sentiment rather than cutting up the stamp. It is up to you. To finish my sweet little home I added the NEW hearts stamp colored with some RV32 Copic Marker to create smoke coming out of the chimney. And lastly a sweet little cherry blossom flower to draw the eye to the sentiment.
My next project incorporates crochet and is a gift for a friend. I have been crocheting since I was 8 years old so it is very easy for me to whip up a project like this. If you are new to crochet and want to try this there are many videos on YouTube to assist with learning. There is also a tutorial for this type of project on Ruth L's channel: HERE.
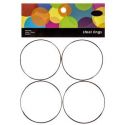
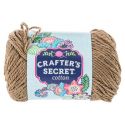
I started by gathering my needed supplies as per the video linked above. Many of them were purchased at my local Hobby Lobby and I have linked to them below. The stitch I used to edge my frame is different then the scalloped edge in the video. I just did two rows of single crochet scallops for a more "lacey" look and to create an area to thread a ribbon. I once again used one of the houses that I had paper-pieced in the patchwork style. I then added a heart tag from the Beautiful Little Wishes Sweet Cuts with the same sentiment used on my card above.
I embellished the frame with some mint seam binding strung through the openings I crocheted and some small velvet leaves. The pearl cluster embellishment is an old button I had in my stash. I used one on the leaves and one to embellish the bow at the top of the frame. I used hot glue to attach them.
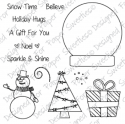
The back of the crocheted frame is finished with a felt and foam circle die cut. I purchased some adhesive backed foam and die cut a circle then added the felt circle to the adhesive side. I then hot glued the finished circle to the back of my frame to make it look nice. I then added a metal charm that says "Families are Forever with a tiny little house on it. So sweet! And a tag that says "A Gift for You" which is from the "Snow Time" stamp set.
Thanks so very much for visiting me today. Sorry it is kind of a long post! It is now time for me to send you along on this wonderful Sneak Peek blog hop! Here is a list of all of the links to help you on your way:
Debbie Marcinkiewicz – Paper Sweeties
Jill Norwood (you are HERE)
Karen Letchworth (Welcome to Karen our newest Design Team Member!)
Jill Norwood (you are HERE)
Karen Letchworth (Welcome to Karen our newest Design Team Member!)
And don't forget to return tomorrow for Release Day FUN! The entire Design Team will all have lots more to share with you then! I cannot wait to hop around myself and see what all of the Sweeties Teamies have made with these wonderful new products! Happy Hopping!




SUPER cute, Jill. I'm loving everything. This new release is SO cute.
ReplyDeleteHave a blessed week,
Karen
Love all the sweet elements you used for your amazing projects, Jill!! The houses with hearts and different patterned papers are fabulous!!
ReplyDeleteOh, Jill! What a fabulous post! I am seriously in love with your sweet projects, and thoroughly enjoyed getting this peek behind the scenes at your creative process. I have always loved the warm homespun feel of quilts (both my grandmothers were quilters), so this post truly steals my little heart away. Gorgeous card with so many sweet details. I am loving the touch of vellum and corrugated board on there. I am a sucker for that type of shabby chic look. And your crocheted ornament is the sweetest thing ever! Wish I could crochet! Amazing!
ReplyDeleteSorry for being so MIA lately. I'm almost back to a regular schedule (I hope). Wishing you a very, very happy birthday today! Hugs!
Audrey - thanks for your sweet comment and birthday wishes! I feel like I am mia on commenting lately too! Life can be so hectic for sure! Never worry about it...we are friends!
DeleteHugs!!! Enjoy the weekend! 😀❤
Oh my goodness!!! I am in love with these !!!! And I am so glad that you share your creative process!!! I have been in lull, and this has inspired me!!! Thank you! And I love how you just "whip up" the crochet projects !!! Unbelievable, girl!!! And Happy Birthday!!!!!
ReplyDeleteThanks Mackie! I cannot believe you are in a lull woman after seeing your cards for this months relelase but I know we all go through it! Your cards are always AMAZING and INSPIRING! I am in AWE of your coloring and design style!
DeleteOh my lordy be, Jill! AMAZING doesn't even begin to describe how fabulous these two projects are! The patchwork house card is so beautiful and the ornament is absolutely stunning and so special! What a handmade treasure!!!!!!!
ReplyDeleteThanks Debbie! I am loving Larissa's rainbow bubblegum ball necklaces! Perfect with the rainbow in this new set!
DeleteWow wow wow! Gorgeous projects...so cool to see your process too! Love it!
ReplyDeleteYou had a lot of fun and I love every design! Great job with the inspiration!
ReplyDeleteYour card is absolute sweetness and the crocheted project is over the moon fabulous!! Love these to bits Jill!
ReplyDelete