Showing posts with label Christmas Card. Show all posts

Monday, December 1, 2014

"House of Cards" Designer Blog Hop

Hello Friends,
Here today with Paper Sweeties to celebrate the "House of Cards" end-of-term Designer Blog Hop.  House of Cards is a wonderful card challenge site hosted by our dear friend Mynn!  She invited the Paper Sweeties designers to join her creative team for a BIG collective blog hop – so much FUN!   Here is the inspiration:


And here is the card I created:


Yes....I did take the picture in the snow!  We had a rare sighting of the white stuff here in Seattle the day after Thanksgiving!  My son was OVERJOYED!!!!!  For this card I used my new FAVORITE Paper Sweeties stamp set called "Homemade with Love".  Isn't that cup of cocoa yummy looking!  I love the matching dies too!  So easy to whip up a card or tag in minutes!

I clear embossed the mug stamp and love the texture and shine it added to the cup!  I also added some glossy accents to my peppermint stick! Then there is the glittery snowflake marshmallows!  Gotta have those marshmallows and lots of them in your cup of cocoa!  Or so my son says!

Here is a list of all the Paper Sweeties designers that are participating in the hop:

  If you get lost check in at the Paper Sweeties blog. Or at the link I shared above for the House of Cards challenge site.


Thanks for joining me today!  
:) Jill


Sunday, November 30, 2014

Paper Sweeties Inspiration #26 December 2014 - Happy Holidays

Hello Friends,
Here to celebrate the "Happy Holidays" theme of Paper Sweeties Inspiration #26 for December 2014.
Love these traditional Christmas colors!
(updated with new photo on 12-1-2014)
I used the new stamp set  "Homemade with Love" to create my sweet Peppermint cocoa card and tag set.  I love the matching Homemade with Love sweet cuts dies too! It made creating this set a piece of cake!  And I even used the snowflake die to create snowflake shaped marshmallows for my cocoa!  Yummy!  

I hope you will join us in this month's challenge over at the Paper Sweeties blog!  There is always a lovely prize to be won so come over and check it out!  We would love to see your Paper Sweeties creations!  And there are some free digital stamps on the Paper Sweeties sight if you do not own any of Debbie's wonderful stamps, dies, and goodies yet!  Here is the hop list for this month:
Debbie Marcinkiewicz – Paper Sweeties <– you are here!
Jinny Newlin  *special guest designer*
Julie Tucker-Wolek – WELCOME TO THE TEAM!!!
Lisa Elton
Lysa Rohrer
Mackie Robertson – WELCOME TO THE TEAM!!!
December Guest Designer: Diane Hover
Jill Norwood (You are here)

Thanks for visiting me and taking a look at my card!
I hope you enjoy this lovely time of year!
Blessings and Crafty Hugs,
Jill

Thursday, October 30, 2014

Festive Friday Challenge #43 Ocotber 25 - Nov 5, 2014


Hello Friends,
Are you ready for the most wonderful time of the year?  I am trying to get ready hence I joined in the Festive Friday Challenge #43 today!  Here is the wonderful inspiration graphic:


I was inspired by the deep red and dark grey tones in the photo as well as the pops of white.

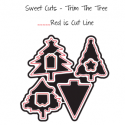
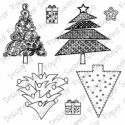
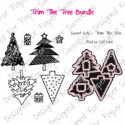
I used a new stamp and die set from Paper Sweeties called "Trim the Tree".  This tree actually stamps and die cuts all in one piece but from the first moment I saw this set I knew that I would be cutting the sections apart to make some cute "wonky" Christmas trees.  I actually made 3 cards today but will share the other two later on. 
I selectively inked the sentiment so that the word "wonderful" could be in red!  I love it!!!


Thanks for taking a look at my card!  So nice to be adding to my Christmas card stash!
Christmas Crafting is my FAVORITE!  Did I just sound like Will Ferrell in ELF or what?!  LOL!  Anyone ready for some spaghetti with maple syrup?
Hugs,
Jill


Saturday, November 9, 2013

Curtain Call Inspiration Challenge - Welcome Home


Hello,
Had a bit of time to play in my craft room tonight and decided to play along with the Curtain Call Inspiration Challenge - Welcome Home.  Here is the inspiration graphic:


I love wreaths, turquoise, and old barn wood and when I saw this photo I fell in love.  I have also had my new Rustic Wreath stamp and die set sitting on my crafting table awaiting time to play hence this card was born tonight in my crafty studio:
I used several stamp sets to create this card including:
Love Lives Here Holiday - for the sentiment; Mat Stack 1 collection - for that little acorn branch under the sentiment; Lovely Layers for the leaves on the wreath; And the die from Rustic Wreath cut from three different papers and wrapped in jute twine to create the wreath itself.  Also in keeping with it being an outdoor wreath I added some Aleene's Glitter Snow which gives it that frosty look with just a wee touch of snowy sparkle!

Thanks for taking a look at my card! I sure enjoyed the time spent making it this evening!
:) Jill

Supplies:
Cardstock:  Rustic Cream (PTI) and Berrylicious (MFT)
Stamps:  Love Lives Here Holiday; Mat Stack 1 Collection; Lovely Layers; Pinecone stamp - wood mounted - not sure of manufacturer.
Inks:  Memento and PTI and SU - various brown shades
Dies:  Lil Inker stitched square/circles; Rustic Wreath Die - PTI; Lovely Layers Die - PTI. Snowflake Impression Plate - PTI
Other:  Digital Papers - Iralamija Shop on ETSY and Gingham Papers - not sure of source but from ETSY.
Jute Twine: WMS; Aleene's Glitter Snow;  

Friday, November 9, 2012

Cloud 9: November Blog Hop


Hello Friends,
Today is the day of the Cloud 9 Blog Hop for November 2012!  Yeah! 
Here is the yummy inspiration photo:


I had a ton of ideas bouncing around in my head after seeing this photo.  I was inspired by the windows and the trees inside and I got the idea of creating a card where the person would be viewing the Christmas Tree through a window.  Each year at Christmas time we always place our tree in the main living room window so that the neighbors can see it each evening when I turn the lights on. 
The idea of seeing the Christmas Tree through the window was the inspiration for this card:

I used some clear acetate to back the opening I made with the largest pinking squares stacklets die from WPlus9..  After looking at the beginning stages of my card I decided I needed a "window frame" in a creamy paper to offset or balance all of the red.  Since I had already used the largest stacklet die from WPlus9 I had to improvise and pulled out my Spellbinders pinking squares dies to create one. 

I then stamped and hand cut the tree (I don't have the die yet as it is sold out) and then stamped and hand-cut a second heart and popped it up with some foam tape. I layered it onto the largest WPlus9 stacklet die cut from some Crafty Secrets CD#3 red music paper I printed at home.  (Love this as I never run out of it!).
I used the Folk Art Flurries stamps to add some kraft ink snowflakes to the card front and then placed the beautiful sentiment from Pretty Patches Tree and colored in some of the letters with a copic marker. A Magnolia border strip of green cardstock was added along with a 1/8" border of May Arts velvet ribbon.
A little bit of diamond stickles on the faux "window sill" finishes the card!  You know me I have to have a little glitter on all my Holiday cards!

Thanks for taking a look at my card!  I am excited to see what others make!  I might need to make another card so I can incorporate some of the other colors in the inspiration photo!  I still have so many ideas in my head!  Happy hopping everyone!
:) Jill


NOTE:  The border diecut is from a Magnolia Stamps border die that has been discontinued. If you are interested in this type of product BlueMoonScrapbooking.com has a wonderful selection.


Monday, October 15, 2012

A little pair of mittens to warm you....


Hello Friends,
Here today with a card I made just for fun - no challenge in mind I just wanted to play with some new stamps and dies called "Very Merry" that I ordered recently from Taylored Expressions for the start of Holiday card and tag making.

I just had to create that sweet little pair of mittens.  I added the little snowflakes in the center of each and the border of baby pink felt to create warm fuzzy cuffs. I apologize for the picture quality my normal computer is down and I am working on my laptop which does not have my normal picture editing program available.  Alas this appears a little dark to me so I apologize!


 A quick glimpse of the inside of the card:


That is it for me today.  I am off to get my little one from school and it is the start of basketball season tonight too!  Busy busy days!!!  Thanks for taking a look!  Do you have a favorite new holiday stamp/die set?  Would love you to let me know in the comments!
Smiles,
: ) Jill