Hello Friends,
Yay! It is time for the March 2015 release at Paper Sweeties! We start today with some "Sneak Peeks" of what is coming out on the 15th!
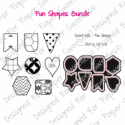
Here are the sets that are being released this month:
You will fall in love with the Stitched Tags #1 stamps and sweet cuts dies! There are three stitched tags in the set - a regular or basic rectangle tag, a heart tag, and a scalloped circle tag. All having matching stamps to go with them.
And...here are my projects for today:
I started by creating a little 4x4" card set for Spring. I used the rectangle stitched tag die to cut my white tags and stamped the flower from the new "I Pick You" stamp set three times to create a focal point on each tag. I then colored them with Copics and added a white pen dot in the center of each flower. I die-cut a colorful gingham mat and stamped a different sentiment on each card in the set. A piece of ribbon tied in a knot and hot glued to the tag's eyelet completes each card.
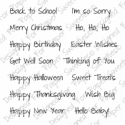
The sentiment "All things grow with Love" is from the new "I Pick You" stamp set. The remaining senitments: "Thinking of You", "Happy Birthday", "Get Well Soon" and "Easter Wishes" are all from the "Occasions" stamp set.
I love how fast this sweet little card set came together!
Next I played with the round stitched tag. My thoughts have been turning to Easter and putting together some little treat cups or baskets for my nieces and nephews. I had an idea to create these mini-baskets using the new stitched scallop circle tag. Here is what I came up with:
And here are the pieces I used to create the treat cup or mini-basket itself:
Two of the new stitched circle tag die cuts. And a rectangle measuring 3-1/2" long x 2-1/8" wide. Score the 3-1/2 inch side at 1" and 2-1/2". Then score the length of the rectangle on both sides at 1/4" to make the flaps that you will be taping to the circle tags to form the treat cup. You will notice in the above picture that I also cut a "v" shape at each of the folds. This makes it easier for the sides to fold and form the box. I used score tape on the 1/4 inch seams and then attached the stitched circle tags to create the sides of the box. Here is one more picture showing how the box comes together:
I created the handle by cutting a thin piece of the same gingham paper and threading it through the hole at the top of each tag as shown in the above picture. I glued the handle in place on the inside of the basket with some strong liquid glue. You need a strong glue so that the handle will hold after you add your candies to it.
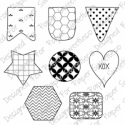
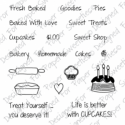
The "Sweet Treats" tags were created using the heart stamp in the "Fun Shapes" stamp set. I stamped the "xox" heart stamp and then colored the back side with Copics and added the "Sweet Treats" sentiment from "Fresh Baked Stand Add-on" set. I actually cut this sentiment stamp in half very carefully so that I could stack the sentiment on my stamping block but if you don't like to cut your clear stamps you could also selectively ink the sentiment to fit it on the tag.
Here is a video showing how the basket is put together! We are doing a giveaway on our YouTube Channel this month of a $20.00 Gift Certificate! Please subscribe to our channel and leave a comment to be eligible to win!
I love how cute the little pink gingham Easter Basket or treat cup looks with the "Easter Wishes" card! And in case you were wondering those are peanut M&M's inside the mini basket! Mmmm! My son really enjoys when my Paper Sweeties projects involve my having to buy candy for photographs! LOL!
It is now time for me to send you on your way. We have some lovely new faces on our design team, Cheryl Lea and Kathy Schweinfurth! We welcome them to their first release as Creative Designers with Paper Sweeties! They are both wonderful designers and we are so happy to have them as Sweeties Teamies! Wait until you see what they and the rest of the team have created for you as you hop around today's "Sneak Peek" posts. Here is the entire link list to help you with your visits:
I hope you will come back tomorrow to see more of the March Release Countdown! I have linked all of the Paper Sweeties products I used to create my projects (except for the new releases) in the Thumb-linky list below.
Thanks for your visit!
:) Jill


.JPG)




I love card sets, and this one is sooo pretty! And, then you went and made those sweet little treat baskets to match! I have to make at least one of the baskets for my daughter. I can already see it repurposed as a doll basket. :) Hugs!
ReplyDeleteSuper cute card sets and the easter baskets with the bunny are absolutely adorable. Ana
ReplyDeleteOMYGOSH!!! You TOTALLY ROCKED it!!!! These are ABSOLUTELY GORGEOUS!! I loveeeeeeeeee the colors!!!! Sooooooooo cute!!!!!!!!!!!
ReplyDeleteWOW, Jill! These are totally amazing! LOVE the fun colors you used and the use of those stitched tags! Beautiful! HUGS! :) Mynn xx
ReplyDeleteWowsa!!! Love your collection of cards and the sweet Easter baskets, Jill! Awesome creative way to use to stitched circular tag for the sides...so cute! Thanks so much for the tutorial, too!
ReplyDeleteJill, you are SO creative to design those adorable treat boxes!!!!! And your cards are so sweet! LOVE!!!
ReplyDeleteYour little treat baskets are adorable and your card is beautiful! Those new dies look so wonderful the way you dressed them up!
ReplyDeleteWow, such adorable baskets and the little matching cards are wonderful!
ReplyDeleteOh, so much sweetness!
ReplyDeleteThe gingham, the sweet flowers, the tags all add up to super cute little cards!! Darling treat baskets too. Terrific post Jill!!
ReplyDeleteJill!!!!!
ReplyDeleteOutstanding! I love the adorable set of bunny baskets and cards!!! Amazing!
OMG OMG OMG!! SO SWEET!! LOVE EVERYTHING about these!! =) SQUEAL!! =) THANKS for sharing and have a FABULOUS WEEKEND!! =)
ReplyDeleteJust so stinkin' cute. Love all your wonderful cards and treat holders.
ReplyDeleteSo adorable!! Love the colors!
ReplyDeleteThese are just as cute as can be, Jill! Love how you've coordinated the color of the bunny tummies with the baskets themselves! Great use of that die, too! So creative!
ReplyDelete